

Our Design Process: Vignette at Artists Frame Service


Ready to start your next project? Schedule a Design Discovery Call with us today!

Now Offering Premium E-Design Services
Our Premium E-Design is an online design-only service ideal for clients with a DIY spirit who have the time to manage some aspects of the project themselves, such as providing us with photos and measurements of the space.
Guess what?... Sarah Jacquelyn Interiors now offers Premium E-Design Service!
Our Premium E-Design is an online design-only service ideal for clients with a DIY spirit who have the time to manage some aspects of the project themselves, such as providing us with photos and measurements of the space.
What makes our Premium E-Design different?
Designer Room: You will still be working with a real professional interior designer.
Concept: We create and visualize the overall design concept.
Communication: Everything is handled either via email, video call or just by phone, no in-person meetings.
Sourcing: We source all the items for your home, just as we would with our full service client, but retail items only. This means a quicker turnaround time to get your project installed.
Customized Design Kit: You will receive a complete design kit in the mail which includes samples, printed copies of your design plan, mood boards, tear sheets, and a step-by-step implementation guide to execute the project yourself!
Quick Turnaround Time: SJI Premium E-Design offers a variety of rooms which are structured to be completed within 2-week timeline. If time is of highest priority for your project, this service can be a perfect fit!
Timeline and Budget: You implement the design on your own time and budget.
Collaboration: Premium E-Design service is still very much a collaboration between the client and designer. If there are specific pieces or family heirlooms you would like to incorporate in your design, we will work with you in exploring all possibilities.
DIY Attitude: Ideal service for clients who know what they like, have a DIY spirit, but just need some help pulling it all together to create a harmonious space.
Let’s Design Your Room: To sum it all up, Premium E-Design is a great way to get a designer room, in a quick turn around time, that you can implement on your own timeline and budget.
How It Works:
Discovery Phone Call: Book a free 30 minute Discovery Call with us to determine if your project is a good fit for Premium E-Design!
Homework: Follow our simple how-to guide with instructions for measuring and photographing your home.
Virtual House Tour: We’ll do a deep dive interview to get to know you and video tour your home.
Mood Board: We’ll email you a mood board and basic furniture layout for your approval to make sure we’re heading in the right design direction.
Design Time: Give us a few weeks to put your custom design together based on your style, budget, and needs.
Receive your Design Kit in the Mail: You will receive your custom design package in the mail with easy instructions to put the room together! What’s included:
Furniture Plans: Printed to scale and easy to read.
Design Board: A collage of all the elements we have selected for your new space, including furniture, accessories, lighting, and more!
Shopping Guide: Includes product details and how to purchase.
Material Samples: Such as wallpaper and fabric samples, paint colors, wood finishes, etc.
Design Review Video Call: We’ll walk you through the content of your Premium E-Design Package on a virtual video call! You’ll provide feedback and we will make reselections if there is anything you do not completely love.
Installation: Purchase product on your own timeline.
Bonus Follow Up Call: Jump on a complimentary 1 hour video call with us anytime over the next 2 months if you have questions about the design and implementation.


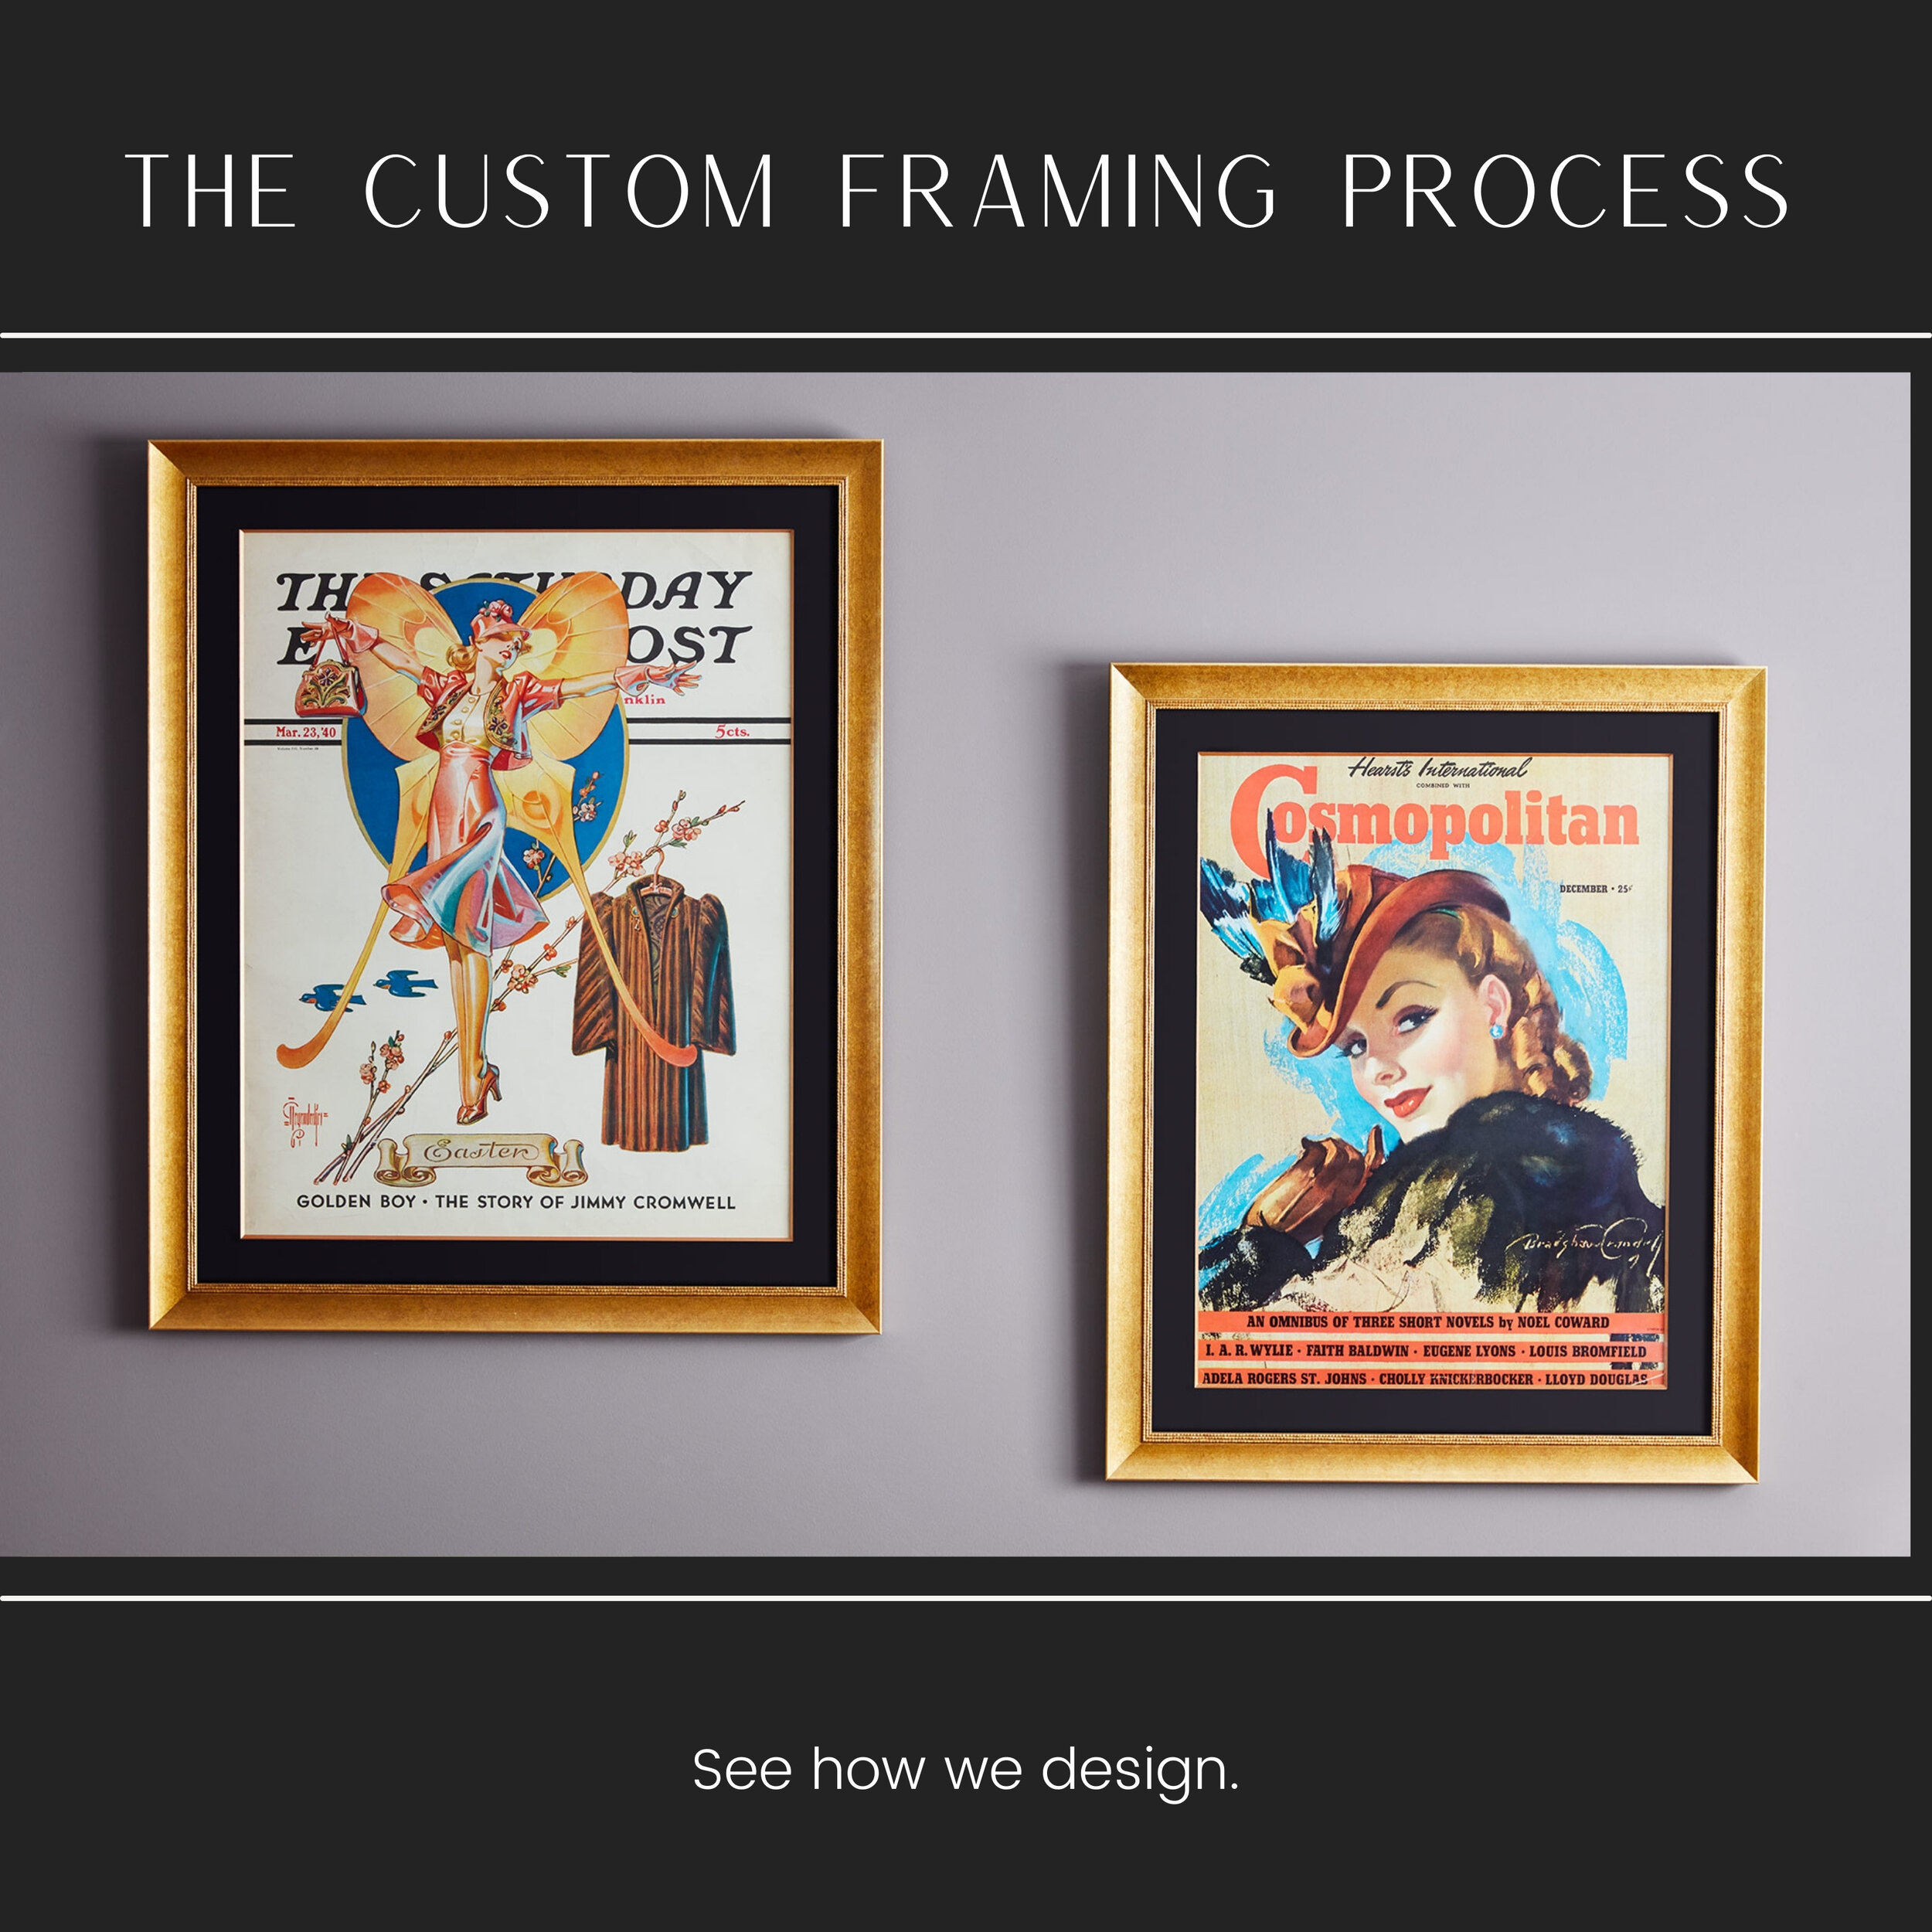
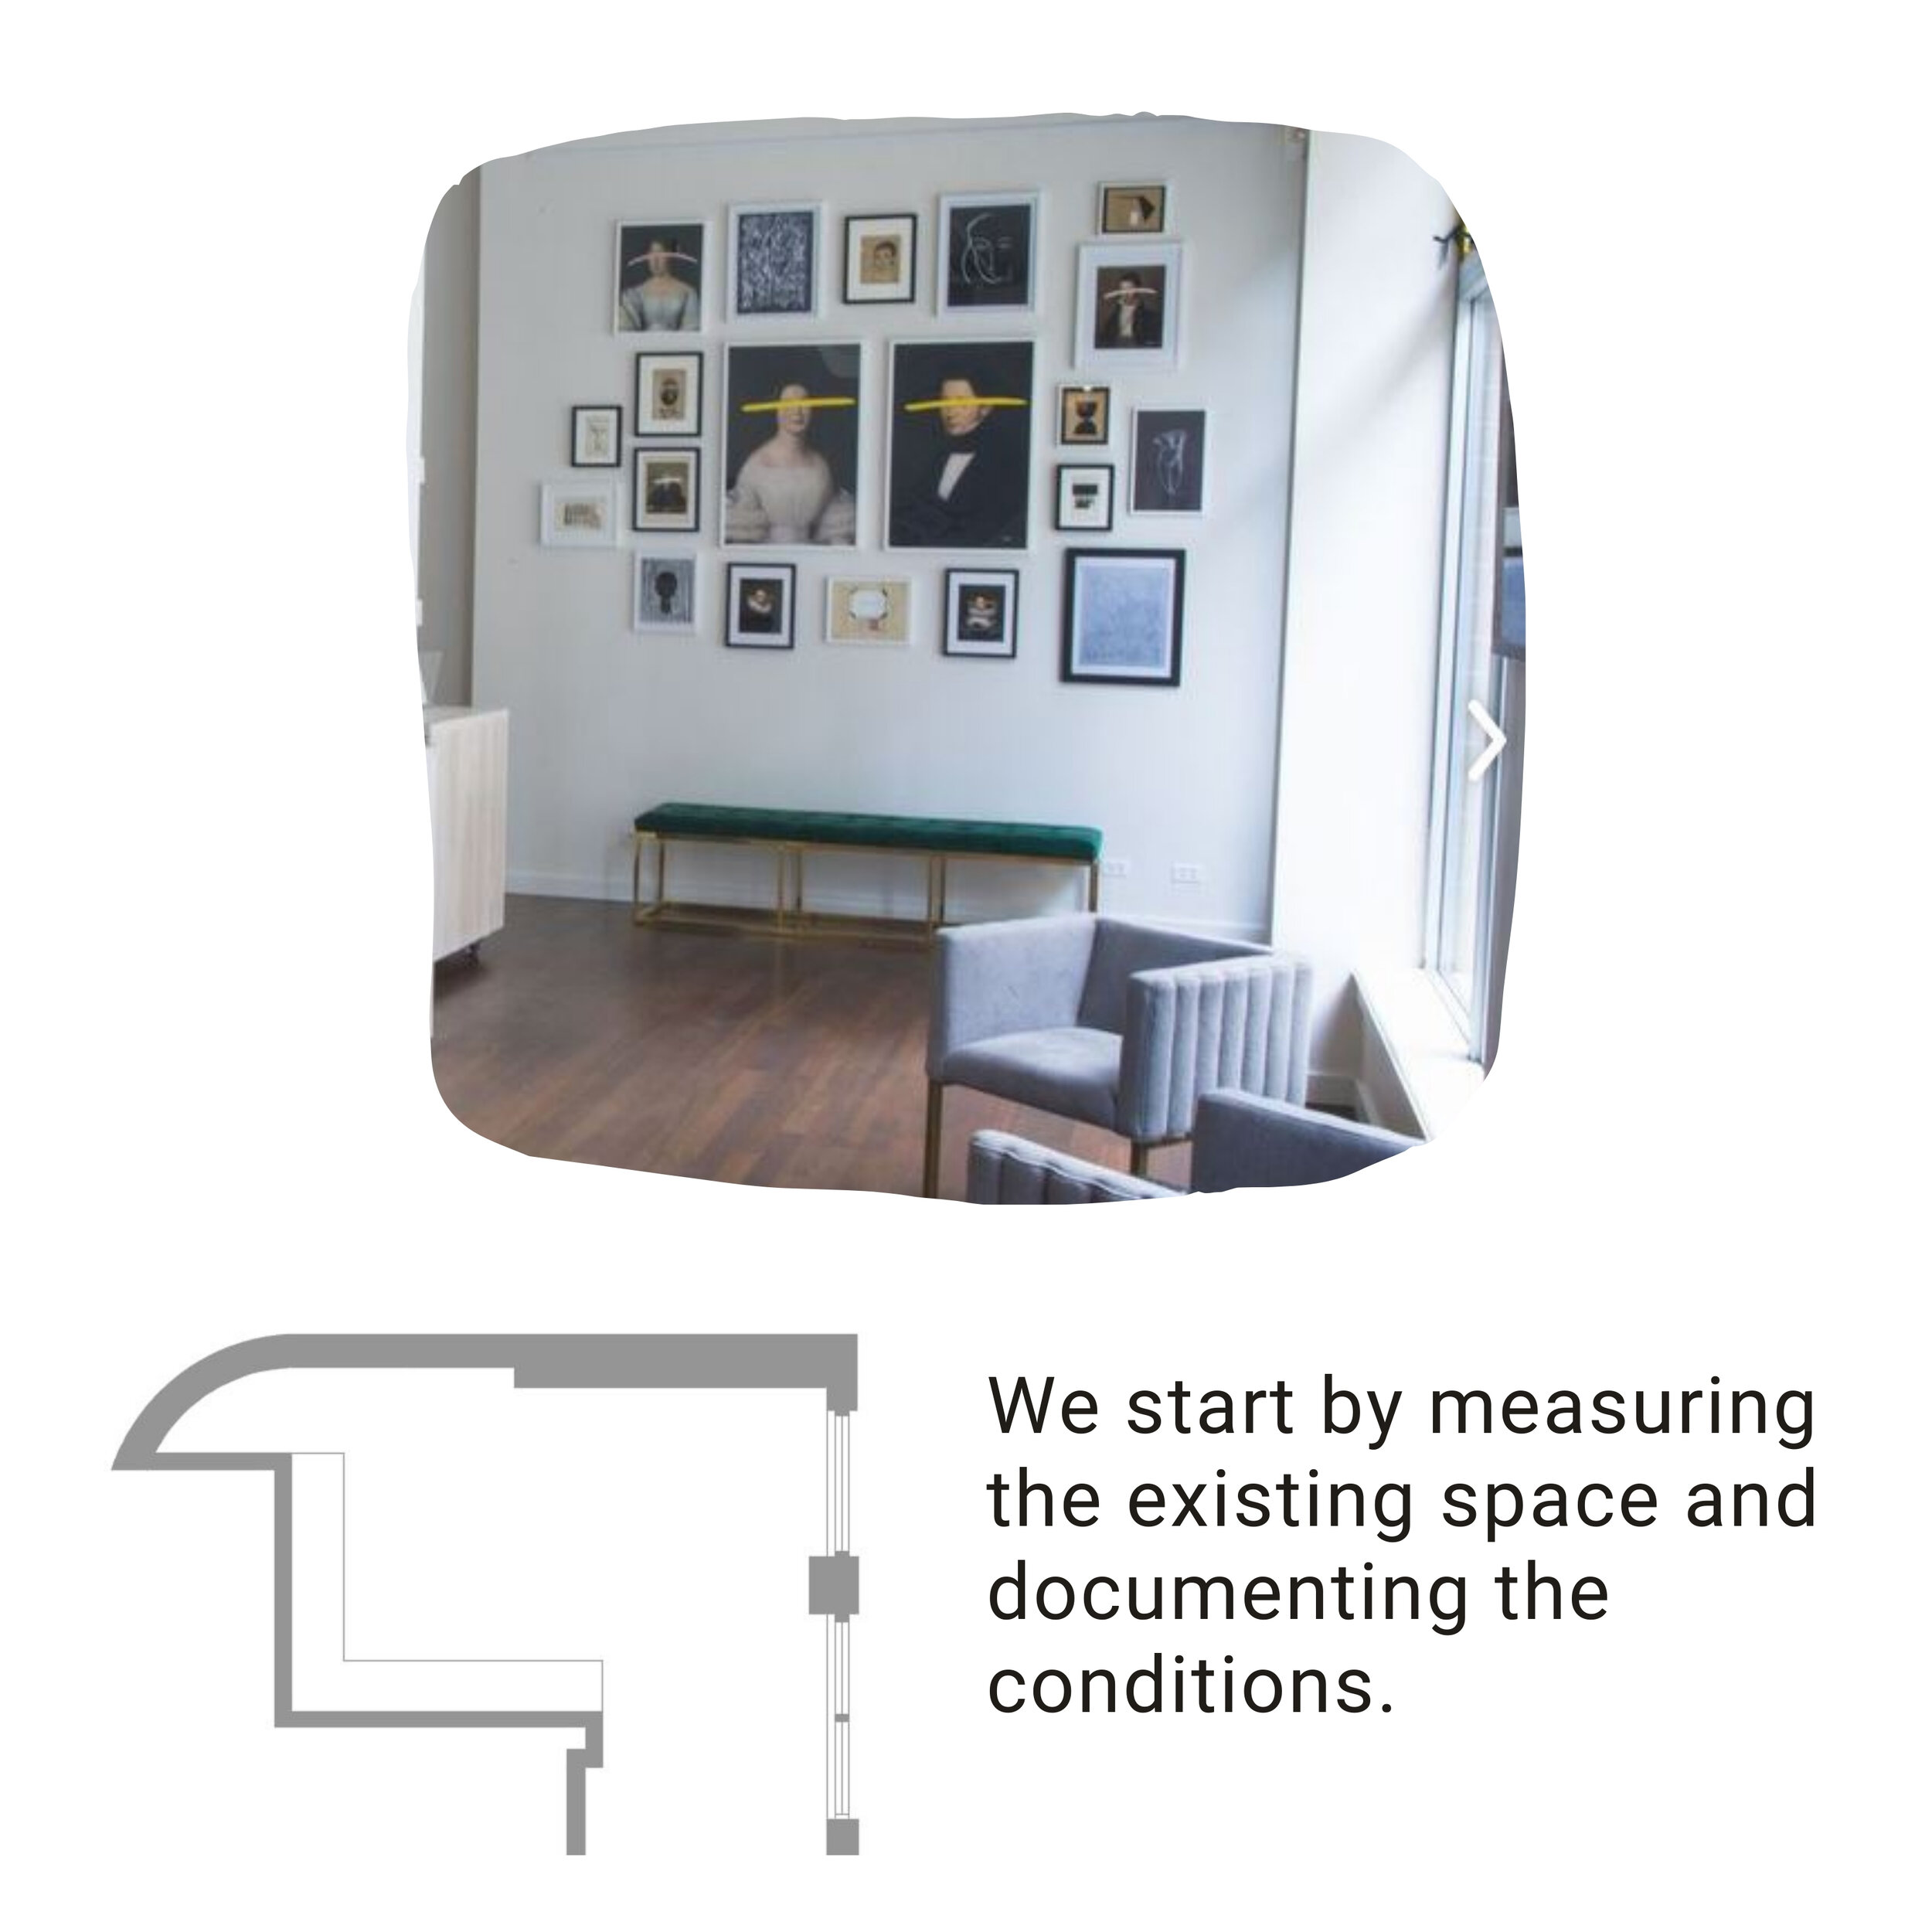
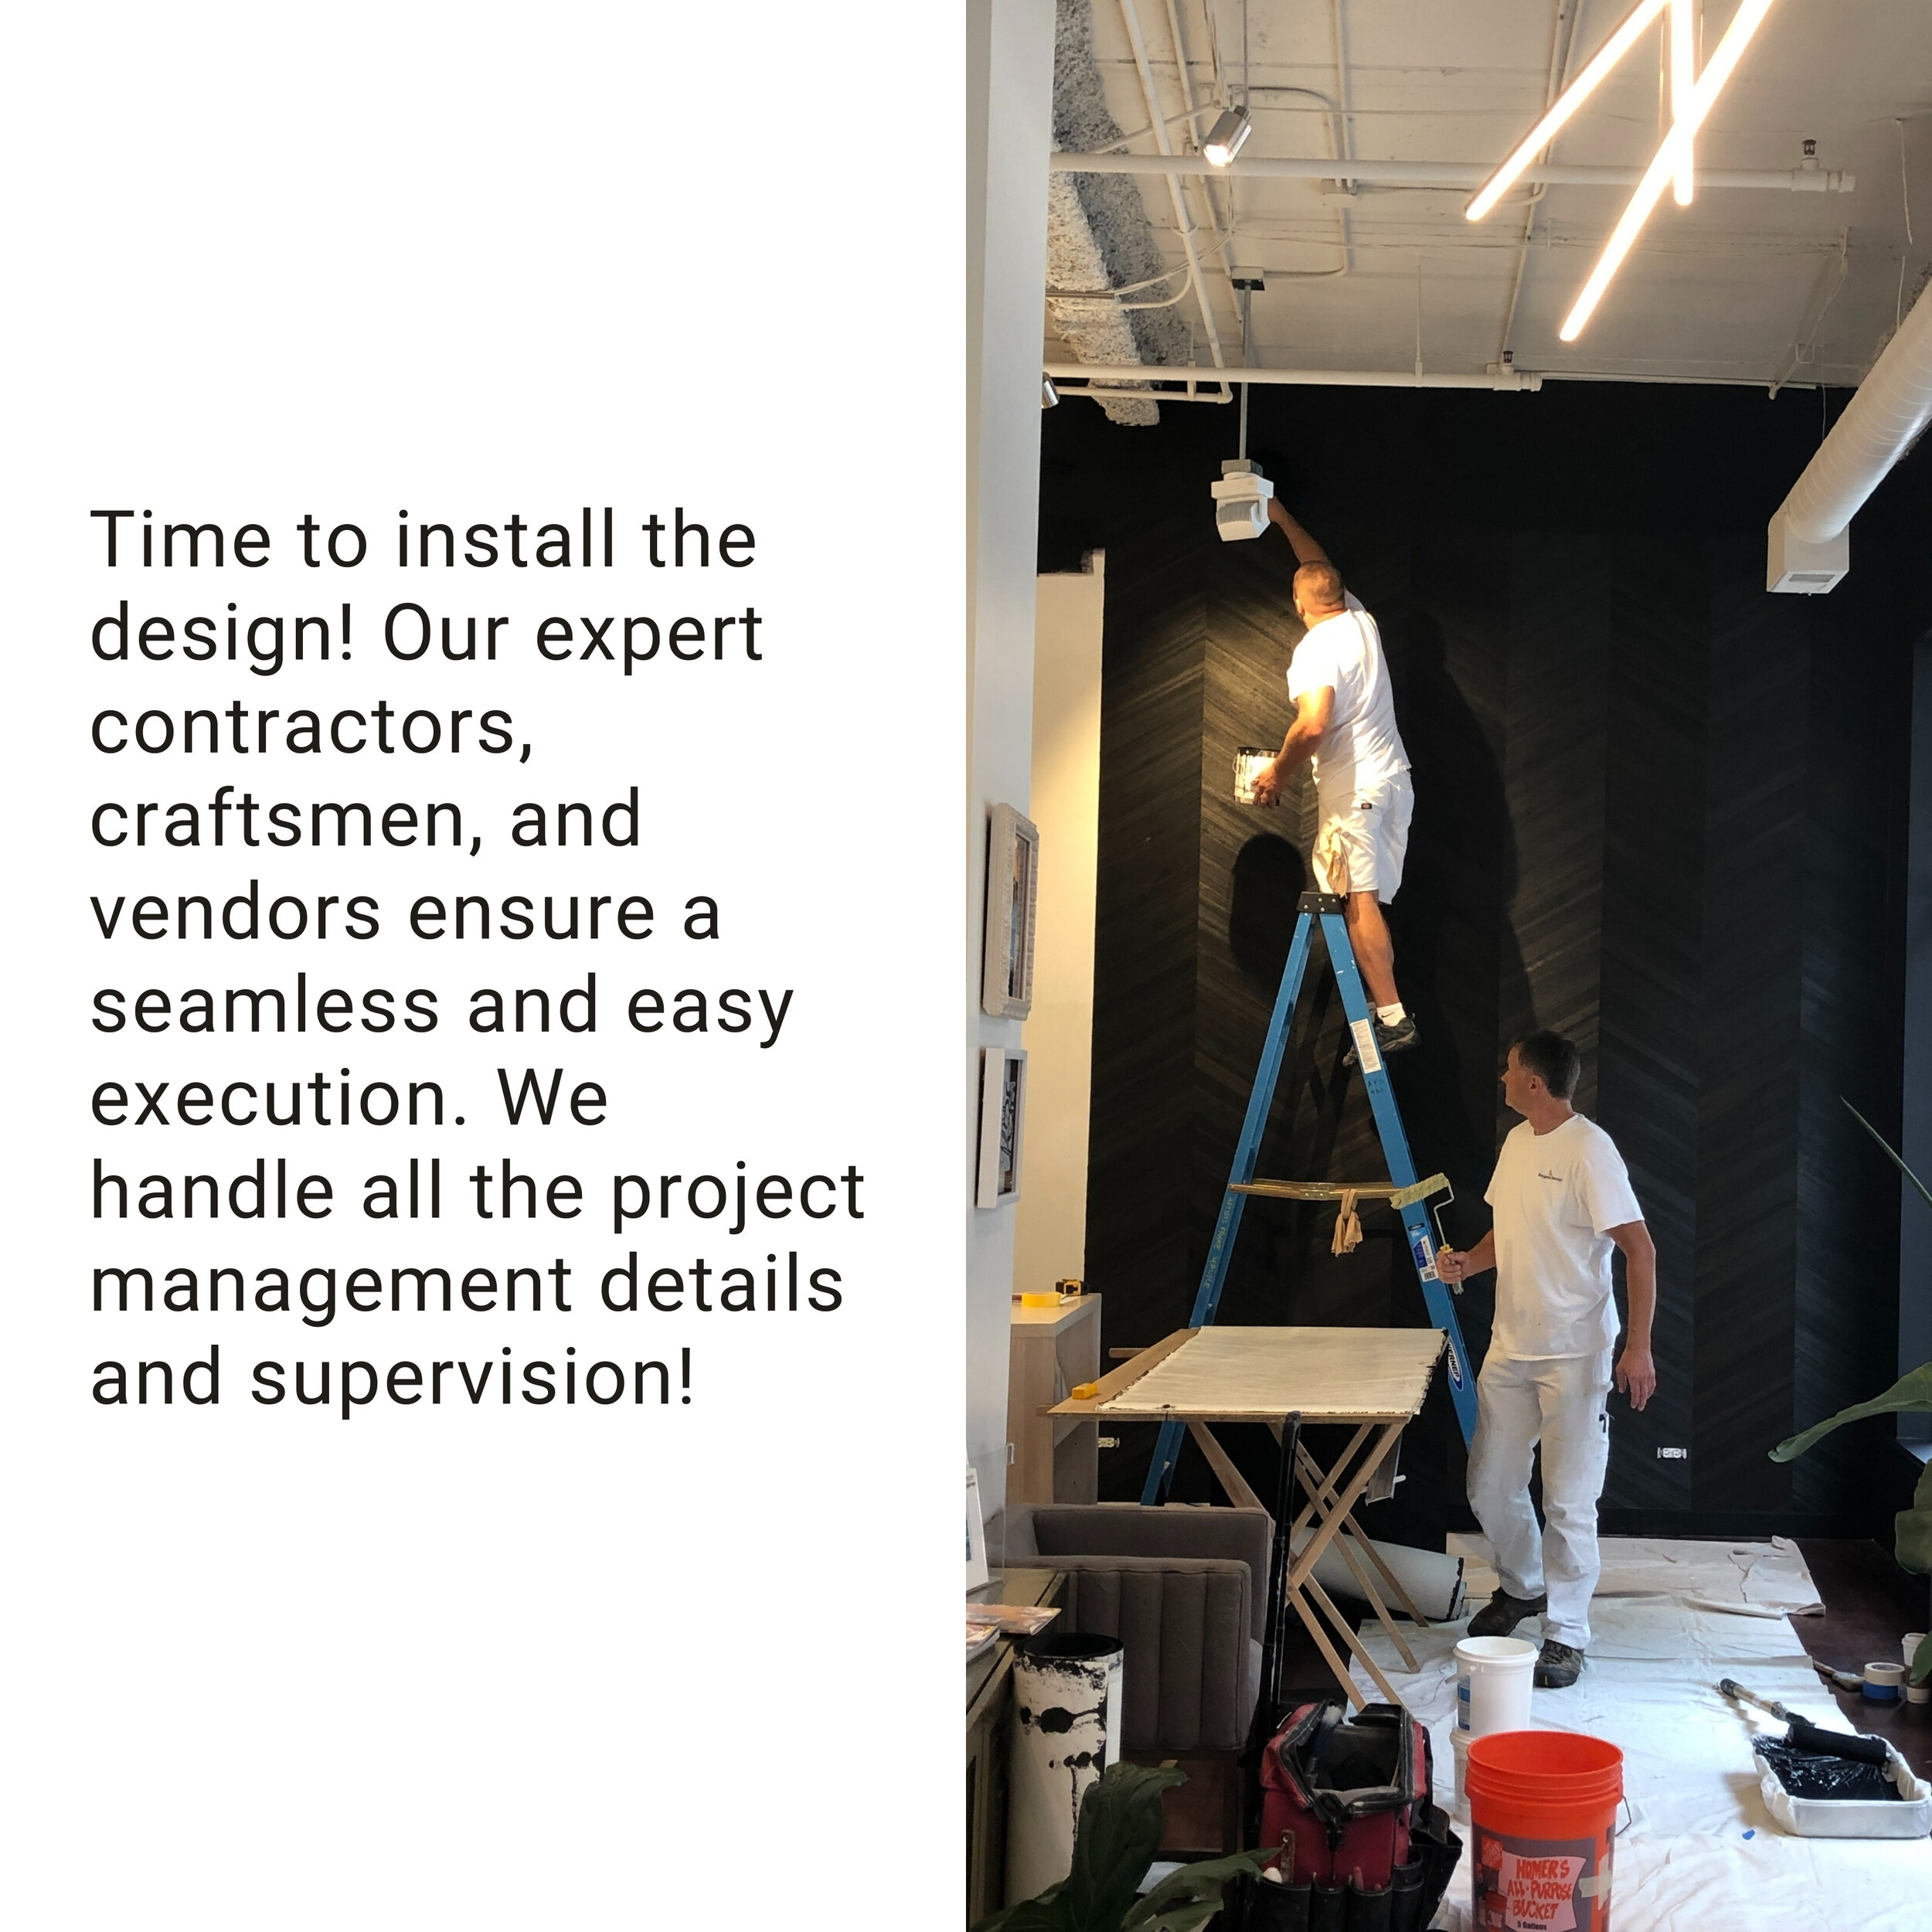
The Custom Framing Process
Go behind the scenes with SJI to see how we design custom frames for our clients.


Ready to start your framing project with us? Schedule a design consultation today!

our top 5 favorite white paint colors and how to use them
With all the white paint colors out there, we do have some of our tried and true favorites that we start with as a baseline when meeting with our clients. Here are our top 5 favorite white paint colors.
People often ask us “What’s the perfect white paint color?” This is a difficult question to answer, because it really depends on your space, surrounding elements, lighting, and the design goals you are trying to achieve. Paint color should be the LAST element you select in your design. There are thousands of paint color options out there, and they vary by hue (color), value (lightness to darkness by adding black or white), and intensity (brightness or dullness by adding the complement color). Whites are particularly tricky because they often have undertones of blue, green, yellow, and red that can affect the look of your space.
Picking the perfect paint color takes a trained eye to understand all of the elements in the space and how they work together harmoniously. So I like to rephrase this question to:“ What is the perfect white paint color for your space?”
With all the white paint colors out there, we do have some of our tried and true favorites that we start with as a baseline when meeting with our clients. Here are our top 5 favorite white paint colors.
Benjamin Moore: Super White
Why we love it: It’s a bright and crisp neutral white that doesn’t have undertones of any other hues. We love using this white on kitchen cabinets to create a light and airy effect.

Benjamin Moore: Super white

Benjamin Moore: NARRAGANSET GREEN

Designed by: Sarah Jacquelyn Interiors | Photography by: Dustin Halleck
Benjamin Moore: Dove Wing
Why we love it: A creamy, warm white with undertones of gray and yellow. This color pairs well with darker grays and nicely brings out the purple tones of Benjamin Moore Stone.

Designed by: Sarah Jacquelyn Interiors

Benjamin Moore: Dove Wing

Benjamin Moore: stone
Benjamin Moore: Chantilly Lace
Why we love it: Delicate like lace, this white is soft, clean, and works with almost any other color! We love using it on doors, decorative trims, and fireplace mantels.

Benjamin Moore: Chantilly lace

Photo Credit: Benjamin moore
Benjamin Moore: OC 151
Why we love it: A subtly warm white that added freshness to the room without being to harsh. We love using this on ceilings!

Photo credit: benjamin moore

Benjamin Moore: OC-151
Benjamin Moore: Decorators White
Why we love it: A timeless, classic white with cool undertones. This white is great for walls!

Benjamin moore: Decorators White

photo credit: benjamin moore

Need help selecting the perfect paint colors for your space? Schedule a 2 Hour Paint Consultation with us today!

Get the Best Sleep Ever! Luxury Products for a Relaxing Bedroom
Improve your overall health, wellness, and quality of sleep this year with these luxurious sleep products that will make for the most relaxing sleep ever!

Quality sleep plays a vital role in our overall health and wellness. Sleep allows us to recharge our mind and body, leaving us refreshed and alert to start a new day! Sleep helps to repair our heart and blood vessels and sleep deficiency is linked in an increased risk of heart disease, kidney disease, high blood pressure, diabetes, and stroke.
Improve your overall health, wellness, and quality of sleep this year with these luxurious sleep products that will make for the most relaxing sleep ever!
1. Hästens Down Slipper Boots
These are one of my favorites and an absolute must have! Hästens Down Slipper Boots keep your feet warm during the cold Chicago winter nights. The material is so soft and breathable, it’s like wearing clouds!
$160.000


2. Slip Silk Pillowcases
3) Slip Silk Pillowcases help with wrinkles, bedhead, and sleep crease. Made with the highest grade of long fiber mulberry silk for softness and durability and no toxic dyes. We love the pink marble color way!
$89.00 Each/ Queen Size

3. Morgan Lane Sleep Lids Cashmere Mask Set
This Sleepy Lids Cashmere Mask Set is the perfect splurge to treat your self! Incredibly soft with an elastic bad for a comfortable and relaxed fit. Block out the light and sleep peaceful all night!
$198.00

4. Vitruvi Stone Diffuser
Designed to promote peace and relaxation, the Vitruvi Stone Diffuser in color Sea is one of our favorites to add ambiance to the bedroom! Add in a few drops of lavender essential oil create a serene oasis to melt away.
$119.00

5. Proper Sleep + Calm Tea
Proper Sleep + Calm Tea is for anyone struggling with falling asleep, staying asleep, or wants to reduce stress. It’s the perfect natural supplement to add to your wellness routine to support a restful mind and body.
$39.99

6. Hatch Restore Smart Light and Sleep Sounds
The Restore Smart Light and Sleep Sounds from Hatch can create a personalized routine to help you fall asleep, stay asleep, and wake up completely refreshed! Create a mood from a variety of soothing sounds and lights. Gently wake up to a custom sunrise alarm that supports healthy cortisol levels.
$129.95

7. Vispring Mattress
Invest in yourself by getting the best quality sleep every night on a Vispring Mattress. The perfect amount of softness and support. Melt away in this amazing mattress. Our favorite is the Vispring Lasalle.
Vispring LaSalle: $7,562.00 - $13,862

8. The Pillow Bar at Chicago Luxury Beds
Indulge in the perfect night sleep with a pillow made especially for you at Chicago Luxury Beds at The Pillow Bar. Their trained pillow makers will craft you a pillow for your unique sleep style, size and age.
$275 for One Queen Pillow

9. Sferra Millesimo Bedding
The Sferra Millesimo Collection is a lusciously soft, woven, polished sateen. Featuring an Italian lace inset, with a classic motif, this is luxury bedding at its finest.
$1,695 Queen Duvet Cover
$850 Flat Sheet
$695 Fitted Sheet

10. Luxome Weighted Blanket
This 30lb extra large weighted blanket from Luxome is engineered to help you relax and sleep better. Comes with a 100% Percale Cotton inner weighted blanket and removable cover that are both 100% machine washable.
$240

Need help designing your dream bedroom? Schedule a design consultation today!

WE NEED YOUR HELP: Support the Interior Design Profession by Creating a Witness Slip Now
We need your support to ensure the Registered Interior Designers Act is not eliminated. Supporting the profession is easy, and only takes a few seconds. Click for instructions!
The Illinois Registered Interior Designers Act is set to expire on January 1, 2022. If our Act is not extended by the legislature this year, it will be eliminated. HB 1738, currently in the legislature, will extend our Act to 2032.
We need your support to ensure our Act is not eliminated. Supporting the profession is easy, and only takes a few seconds.
Here’s how you can help:
No later than close of business on Tuesday (3/16), please do the following:
Click this link: https://www.ilga.gov/house/committees/hearing.asp?hearingid=17993&CommitteeID=2672
Click the light grey box at the top - “Create Witness Slip”
Scroll down to “HB1738 Nicholas K. Smith REGISTERED INTERIOR DESIGNERS”
Click the graphic that looks like a pencil and paper to the far right of “REGISTERED INTERIOR DESIGNERS”
Fill out ALL information boxes
For “Firm/Business Or Agency” you can put “Self” or your firm, business, or agency.
For representation, you can put your firm, business, or agency or “Self”
Position: select “PROPONENT”
Testimony: select “Record of Appearance Only”
Agree to terms and complete reCAPTCHA
Click “Create Slip”
Make sure you receive a success message.
SHARE THIS LINK WITH ANYONE WITH AN ILLINOIS ADDRESS. We need as many proponent record of appearance only slips as possible.
Thank you for Supporting the Interior Design Profession!
- Sarah Schwuchow, ASID, NCIDQ
Registered Interior Designer in Illinois


ASID Illinois President-Elect
I am excited to announce that I have been voted in as the President- Elect for the American Society of Interior Designers Illinois Chapter. My one year term as President-Elect will begin on October 1st, 2021 and I will serve as President for one year starting on October 1st, 2022.
I am excited to announce that I have been voted in as the President-Elect for the American Society of Interior Designers Illinois Chapter.
My one year term as President-Elect will begin on October 1st, 2021 and I will serve as President for one year starting on October 1st, 2022.
My goal as President-Elect is to bring a new and fresh perspective to the Chapter and the Illinois design community. ASID has been such an influential part of my career and I feel that it is my responsibility to give back and help others. I want to connect with our community to demonstrate the value of ASID membership and its impact on personal and professional development.
I hope to inspire our students, engage our emerging professionals, provide value to our professional members, and recognize our industry partners. I will strive for an inclusive community, highlight our members' diverse backgrounds, and motivate others to pursue paths of leadership.
We will create a community that shares, uplifts, and supports one another, ultimately increasing the awareness of our profession. As the Board of Directors, we will collaborate and communicate effectively to support the President's goals and endeavors. We will commit to improving our Chapter and ensure value for all of our members.
Serving as an ASID Illinois President has always been one of my goals.
Becoming an ASID Illinois Chapter President is a goal that I have had since I was a student member. I remember thinking to myself, what an honor it would be to one day serve on the ASID Illinois Board of Directors. Fast forward ten years later, I’ve achieved that goal as I’ve been serving as the Communications Director for the last year and I excited to start my term in October as President-Elect.
Joining as ASID was one of the most influential parts of my college experience.
I joined as a student member in 2010 after enrolling at the Illinois Institute of Art- Chicago. I was honored to serve as the Student Chapter President for FY11-FY12. With 6 Chapter officers and 22 additional members, our year was an incredible success, winning two ASID National Awards.
This leadership position was critical in forming my character, skill set, goals, and ultimate career success. I owe so much gratitude to ASID and I have strived over the last 10 years to give back and volunteer my time to help design students and my peers.

It is a personal mission of mine to help designers pass the NCIDQ exam and become Registered Interior Designers.
In 2019, I created the NCIDQ Committee for ASID Illinois. The purpose of the committee is to provide supplementary educational support and mentorship for NCIDQ candidates. As the Committee Chair, I lead weekly study sessions for the Spring 2019 testing season for 5 NCIDQ exam candidates. The participants of this study group were able to ask questions, learn new study techniques and benefit from the synergy of working with other design professionals.
After 8 weeks of intense test preparation, I am so proud to say we had a 100% pass rate for the exams each of these candidates took. This ASID Illinois NCIDQ study group has evolved into a partnership with IIDA and is now part of ASID Illinois’ regular offerings each testing season.

ASID has so much to offer!
ASID members can get involved with committees and volunteer groups, attend peer group meetings, educational lectures, and advocacy events, seek mentorship or become mentors, and learn leadership and professional development skills. I would not be where I am today without the support of the American Society of Interior Designers. I look forward to being able to give back every way I can, so that I can continue to support this community.
If you are a designer, student, or industry partner interested in becoming more involved in ASID, please reach out! I would love to have you attend a peer group with me or participate in a committee next year! Sarah@SarahJacquelynInteriors.com


10 Ways to Style Your Home with Vases
Accessorizing is the final layer when it comes to adding personality to your home. Even the most well designed spaces can look empty without the finishing touches added. One of our favorite ways to dial up the design is with vases. There are so many different styles, colors, materials, and textures to vases that when added, can easily elevate your home! Whether they are made of glass, porcelain, ceramic, wood, or even metal, vases can be just the thing to take your space to the next level!
Accessorizing is the final layer when it comes to adding personality to your home. Even the most well designed spaces can look empty without the finishing touches added. One of our favorite ways to dial up the design is with vases. There are so many different styles, colors, materials, and textures to vases that when added, can easily elevate your home! Whether they are made of glass, porcelain, ceramic, wood, or even metal, vases can be just the thing to take your space to the next level!
Here are 10 Ways to Style Your Home with Vases:

1) Make a statement in the foyer! Use an interesting, eye catching piece that will WOW your guests when they first walk in!
2) Decorate your living room coffee table! Remember the rule of 3’s when it comes making an arrangement. A decorative vase with flowers pairs well with a stack of books and a decorative tray.
3) Create a garden oasis in your living room! Go over the top with a big decorative vase and robust arrangement of flowers on the table.

4) The fire place mantel is calling! Use an assortment of two, three, four, our even five matching transparent vases with flowers to add airiness and natural elements to your mantel.
5) The kitchen island is a great place to bring in freshly picked flowers from the garden and add some style to the space.
6) Add visual height to a bedroom console by adding a tall sculptural vase, added flowers are optional!
7) Pick a vase with unique personality to use as a conversation starter when new guests come to visit!
8) Decorative vases are great for adding tactile and visual texture to a space, which creates a dynamic room design
9) Vases are perfect for bookshelves that need to be styled. A glass vase makes a great counterpoint and adds interest to wall full of books.
10) The dining room table is the perfect place for long stemmed vases. These vases leave a clear opening for your guests to talk across the table, while adding height to the space.
Need some inspiration?
Here are 8 gorgeous vases we are crushing on right now!

These Accordion Vases are made of ceramic with a matte gunmetal glaze.

this gilded i-scream vase is made of high-fired porcelain with real gold accents.

This Donna Macalda Head Vase by Stefania Boemi is made entirely by hand and painted in a dark burgundy matte monochrome tint. The eyes are glazed to stand out.

The Escalier bud vases are composed of crystal blocks sitting on top of each other.

Two layers of blown glasss skillfully joined into a single orb. this vase references ITALIAN design of the early 1970’s

The gemma vase in CHAMPAGNE crustal, takes on the look of a DIAMOND with it’s sharp corners and facets.

This large vintage floor vase is from the 1950’s by bay keramik..

This Blue Bird Ceramic Vase by , is one-of-a-kind, and made using a combination of lathe and hand modeling.

Need help accessorizing your home? Schedule a design consultation today!

Interior Design and COVID-19
COVID-19 has impacted us all in different ways. We are learning new ways to cope, connect, and move towards a new normal. Through all of these changes and isolation, we have learned just how important it is to have social support from our friends, families, and colleagues. One of the big questions we face as interior designers is “How will the architecture and design community be impacted by COVID-19?”
COVID-19 has impacted us all in different ways. From tragic loss of lives, to lay-offs and business closures, the strain on our emotional, physical and mental health has been incredibly difficult for each of us in our own way. We are learning new ways to cope, connect, and move forward towards a new normal. Through all of these changes and isolation, we have learned just how important it is to have social support from our friends, families, and colleagues. We’re all missing human bonding.
Our lack of in person contact can trigger what Vivek Murthy, a physician and former surgeon general of the US calls a social recession - “social isolation that has a negative impact on physical and mental well-being of people and can even put us at risk for premature death.” There is reach that links social isolation and loneliness to poor health outcomes such as heart disease, dementia, sleep loss, depression and reduced life expectancy.

To help prevent isolation and a social recession, we need to ensure we are connecting with people outside our home for at least 15 minutes a day. Whether that be a phone call, video chat, or safe distance visit. It’s also important that we take time to help other people, be more conscious of others, and see the bigger picture of how we fit into our community. There are many beneficial health and wellness outcomes associated with acts of generosity, charity, and community bonding. A main one being increasing our sense of belonging and decreasing feelings of isolation and loneliness.
Office Spaces

One of the big questions we face as interior designers is “How will the architecture and design community be impacted by COVID-19?” This is a loaded question, but ultimately, I believe this situation has given the design community the opportunity to be creative in new ways.
As we begin to reopen and return to offices at reduced capacity, new protocols are being implemented, as we disinfect our desks, chairs, keyboards, mouses, and phones daily. Our perspective and safety views on the office environment has changed, as we have all adapted a heightened sensitivity to touch and awareness of social distance. Even with new cleaning policies, there are still challenges with our current office layouts, conference room sizes, elevator capacity, distancing capabilities, and privacy that need to be addressed.
This is where designers and architects come in. We design spaces for people, and the way we design these spaces is going to change.“We’re coming to realize that as designers, architects, and building managers, we have a critical role to play in public health.” (Rachel Gutter, President of IWBI). We will be designing safer work spaces, with social distancing protocols, re-imagined office layouts, specifying materials that are easily cleanable and implementing maintenance schedules. The effects of COVID-19 will impact the way we think about and design spaces of the future.
Work From Home Life
This world wide social experiment of “Can we all really work remotely?” has sparked conversations among many companies on if they even need to return to a physical office. Companies like Google, Twitter and Facebook have embraced the option of the remote work lifestyle permanently. This opens the opportunity for people anywhere in the world to work for these companies since you don’t need to be present at a physical office everyday. Businesses have learned to adapt to the work from home life, and some are even working more efficiently than they did in the actual office. Benefits of remote work are:
Less Time Spent Commuting
Improved Employee Retention
More Independent Employees
Reduced Operating Costs
Diverse Candidates
Efficient Use of Technology
Increased Productivity
Positive Environmental Impacts

Better Work Life Balance
Healthier Employees
Less Stressed Employees
Financial Savings
Customized Home Office
Healthier Employees
Improved Creativity
More Time with Family
Many businesses are seeing these great benefits and investing more in their work from home employee support. A company's ability to do this depends on it’s type of work, flexibility, culture, access to technology and the ergonomics of the employees home. Even after the pandemic, work from home choices will be more of an option than ever before. Studies show that employees with the highest level of satisfaction are those who have options of where, how and when they work.
Residential Interior Design and Wellness
With more people working from home, this will change the way we design residences, specifically by creating a designated office space. Things to consider are layout, placement in the home, acoustical privacy, storage, supplies, sustainable components, ergonomics, clean-ability, healthy building materials, and incorporating strategies to avoid burn out. Creating a new lifestyle where home and work life co-exist in the same space. We’re seeing a major need for these newly developed, creative and healthy spaces in the home.
With a progression towards health and wellness in all facets of our life, and a desire for a cleaner and safer environment due to COVID-19, the Design and Architecture industry is taking great strides to incorporate human health into our environments. WELL Certification is about placing people at the heart of design and enhancing the human health and well being experience. It’s a certification process for buildings, backed by evidence based health and scientific research with leading physicians, scientists and industry professionals.
Over the last few months, I have seen the positive value that the WELL Certification can bring to me as a designer and to my clients. I am working towards earning my WELL AP certification to be able provide health and wellness education and support in our interior design projects. “A WELL AP denotes expertise in the WELL Building Standard and a commitment to advancing human health and wellness in buildings and communities around the world.” (wellcertified.com)
The WELL certification provides me with a unique understanding of how the human body is impacted by our indoor and outdoor environments, and how to create a healthier home for my clients. From contaminants in our water and air, lighting consideration and temperature controls, to healthy eating and fitness, WELL Certification covers all this and more to ensure buildings and their occupants health and wellness take priority, increasing the quality and longevity of our lives.

Stay tuned for more on my journey to becoming a WELL Accredited Professional and follow SJI on Instagram for #WellnessWednesday


Not Your Grandma's Dressing Table
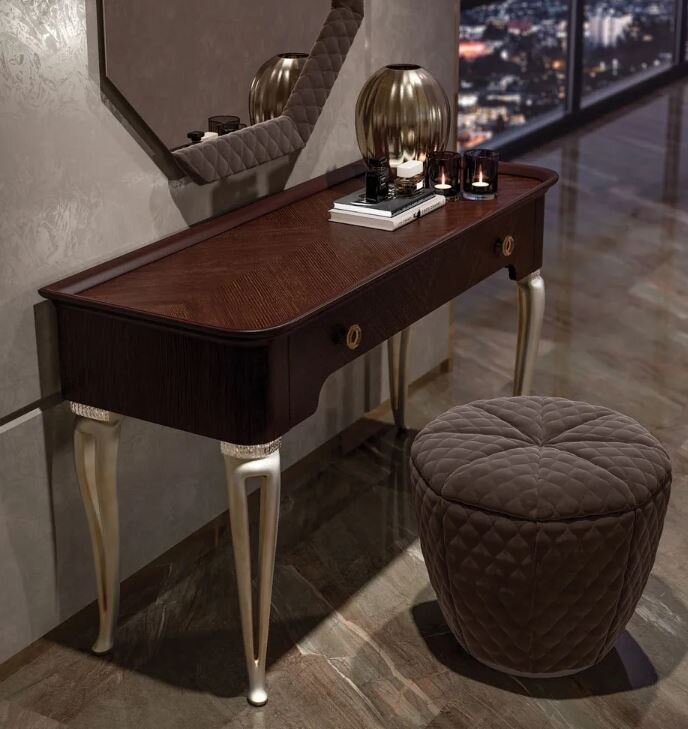
Dressing tables, or vanity tables, were once a necessity in a woman’s bedroom. Somewhere along the way, Americans fell away from this trend and began keeping their cosmetics and perfumes in the bath or powder rooms. But over the years, the dressing table has made a few comebacks. Today, you can find some beautiful and modern-as-they-come dressing tables to beautify your space! They’re practical, can be used to display your aesthetics, and add a touch of sophistication that is truly timeless. Here are some of our favorite modern-day dressing tables!
Dressing tables, or vanity tables, were once a necessity in a woman’s bedroom. Somewhere along the way, Americans fell away from this trend and began keeping their cosmetics and perfumes in the bath or powder rooms. But over the years, the dressing table has made a few comebacks. Today, you can find some beautiful and modern-as-they-come dressing tables to beautify your space! They’re practical, can be used to display your favorite pieces, and add a touch of sophistication that is truly timeless. Here are some of our favorite modern-day dressing tables!
"Innovation is often the ability to reach into the past and bring back what is good, what is beautiful, what is useful, what is lasting." - Sister Parish

Luigi Massoni For Poltrona Frau Modular Vanity 'Dilly Dally', 1968, Italy by Vinterior
Some of Our Favorite Designs

Athena Vanity Table by Luxdeco

Calliope Dressing Table by Opera Contemporary

Jubilee Console by Capital


Outfit Vanity by Cesare Arosio from Laura Meroni
Designer Italian Dressing Table With Crystal Details
by Juliettes Interiors
Styling Essentials for a Modern Dressing Table
It’s important to dress your dressing table just as you would any other surface. A tray is the perfect place to keep your makeup brushes, lotions, and other catch-alls. Having a small box or dish to store loose jewelry and trinkets is a smart option. Don’t forget to add some color with a vase full of luscious flowers! Here are some beautiful and functional accessories we’re crushing on right now.

Brass Inlay Marble Box from West Elm

LARGE GLASS AND BRASS TRAY from CB2

Karat Lantern/Vase - Gold from Amara

Bistro Tile Vanity Tray from Anthropologie

Need help choosing the perfect dressing table for your bedroom? Schedule a design consultation today!

Designer Advice for a Smoother Remodel
A remodel of your home doesn’t have to take years off your life! If you’re thinking of starting your next project, you’ve come to right place to get the best advice on creating a smoother remodeling experience for your home.
If you’ve ever had your house, condo, or apartment undergo a remodel or renovation, you know how stressful it can be. Unforeseen circumstances are a dime a dozen, there are people in and out of your living space, and you’re expected to trust that everyone knows what they’re doing. We’re here to tell you that a remodel of your home, whether it’s a small or large project, doesn’t have to take years off your life! If you’re thinking of starting your next project, you’ve come to right place to get the best advice on creating a smoother remodeling experience for your home.
1. Don’t Skimp on Quality Labor
Sure, your neighbor built his own fence ten years ago and is pretty handy with a hammer, but that doesn’t mean that he’ll be able to install your kitchen cabinets, that expensive backsplash you love, and your new carpet without a few (or many) hiccups. When it comes to renovations, it pays not to go for the discount labor.
A remodel, renovation, or refresh is a huge investment into your living space. The last thing you want is to spend a huge amount of time and money into work that you’ll just have to hire someone else to do over and correct. A quality contractor will also know building codes and regulations and save you a hassle down the road if you decide to sell your home or condo.


2. Know Your City Codes and Condo Association Requirements
This is one of the most important things to do in the early planning stages of your project. Does you city require building permits, special variances, the use of an architect? How much will these fees cost you? Is your home a historic landmark? Will the renovations or remodel require city approval? Be sure to do your research; call your city or village office or visit their website to find out what you need.
If you live in a condo, you’ll need to contact your condo association office before you start any phase of construction. Many condos require any work done to your unit to be approved by a board. You might also be required to use a Registered Interior Designer or their provided building engineer. Some Condos require the use of union labor. You’ll also want to know things like how to move supplies in and debris out, whether or not there is a charge for the freight elevator, and if your contractors need certificates of insurance on file.
3. Plan in Advance
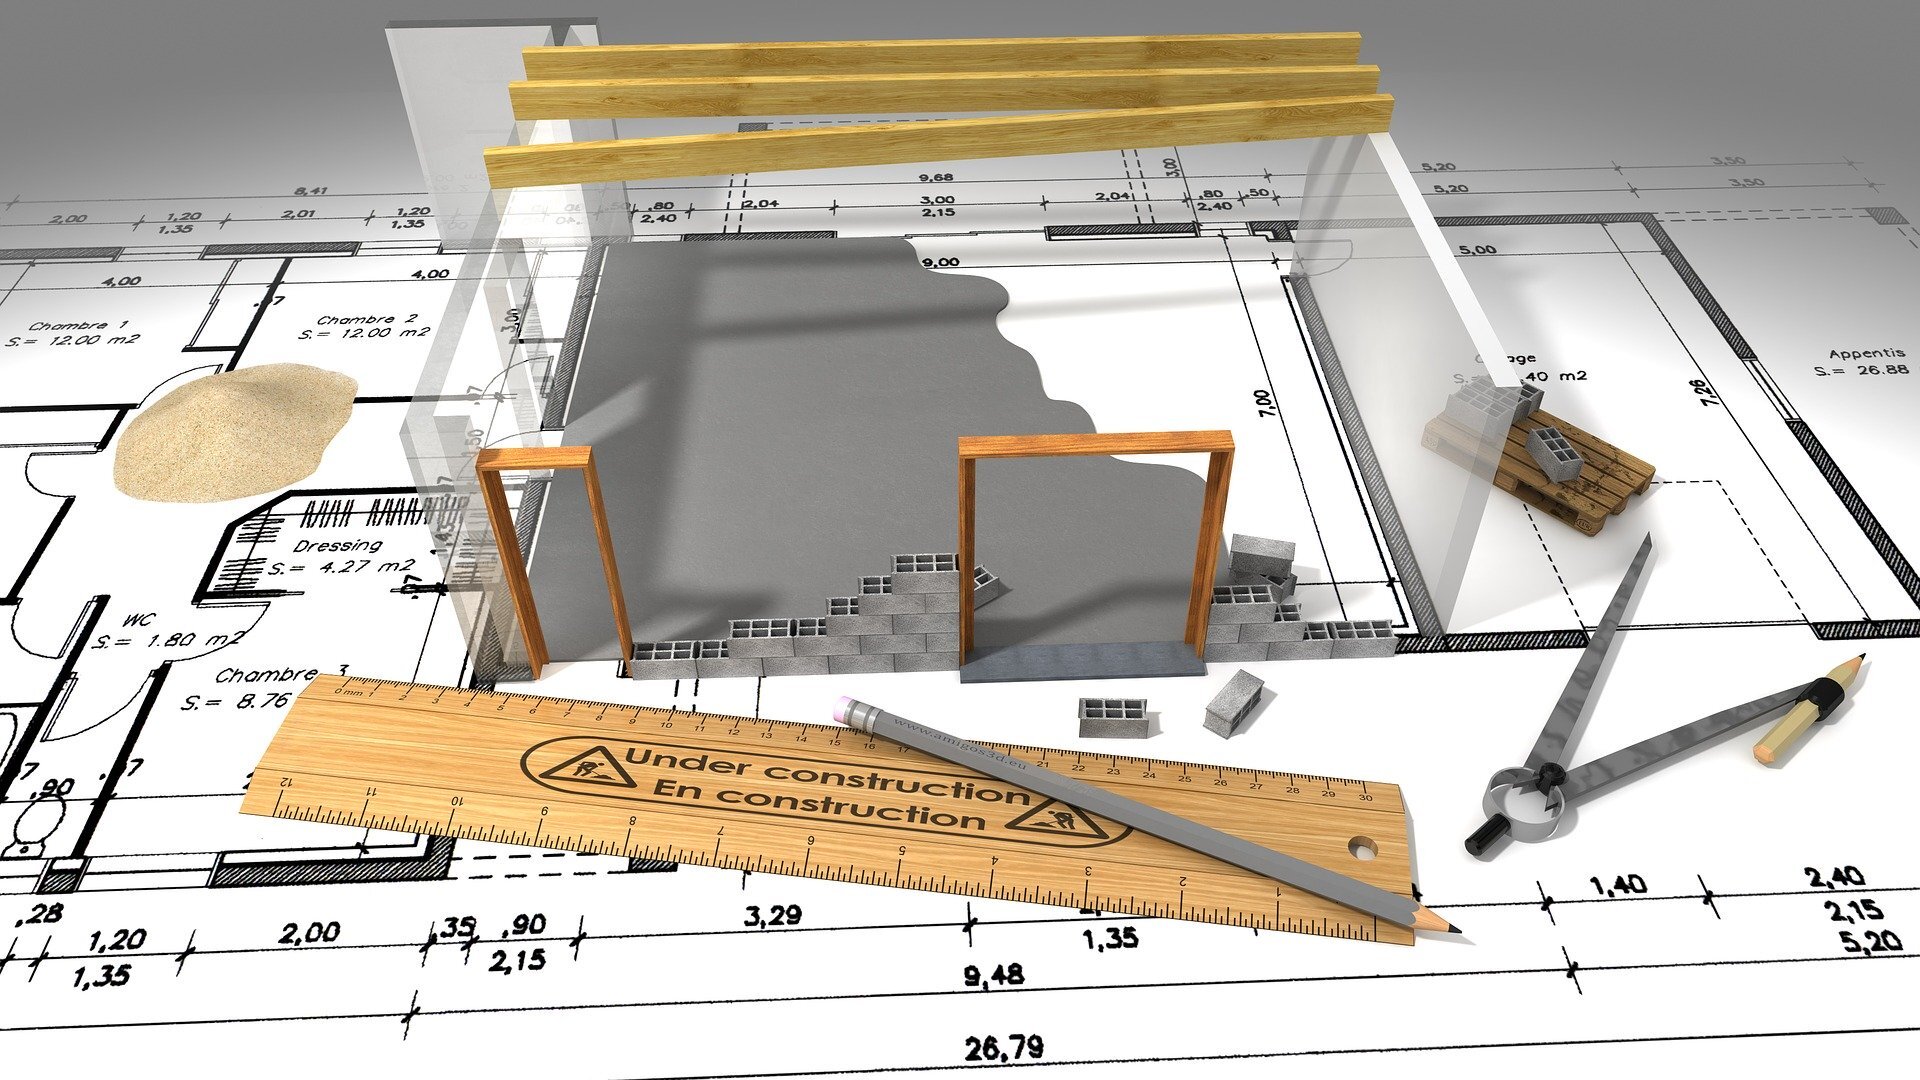
The more you plan prior to beginning construction or renovations, the smoother your project will go. In order to plan effectively, you’ll need to really understand the construction and architectural constrictions of your space to know what is possible and what isn’t.
Work with your contractors and laborers to create a realistic timeline and make sure you include some wiggle room. Don’t start your project until you have a clear scope-of-work and budget established. Make sure to finalize selections and purchases of appliances or built-ins early in the project or before construction even begins to ensure that you have what you need before it holds up your project. The last thing you want is to need to do several last minute change orders to a project, which can cost you extra time and money.


4. Be Flexible
Even the best laid plans can come crashing down around you. Be prepared to make tough decisions if a portion of your plan falls through or a selection you’ve made is suddenly unavailable. Timelines can also be pushed back due to things like weather and the availability of labor. Don’t set your project timeline so tight that you can’t be flexible if the unforeseeable happens.
One of the most important things to be flexible about is your budget. Don’t initially settle on a number that is at the very top of your budget. Chances are, unforeseen circumstances will create additional spending. This doesn’t mean you will definitely pay much more than you have budgeted for, but you won’t be stuck halfway through a project when you run out of funds and you only have half a kitchen. Do your research on the average price of a remodel for your area and quality of product you would like to use.
Another thing to consider is the time you will need to commit to this project. You may have to leave work early or take a few days off here and there to ensure that someone is home to let in contractors, laborers, or to receive deliveries. If this is not something you can commit to, consider leaving a lockbox outside your home for workers to gain access to your space.
5. Be Prepared to Vacate Your Space for Awhile
If you’re remodeling a small portion of your house, chances are this won’t apply to you. Planning a full home renovation or a project that will affect your day-to-day life? Then definitely consider relocating for the construction phase. Living without a kitchen or with interrupted plumbing is not a sustainable existence and will save you and your family a big headache.
You may also need to consider storing some of your furniture and possessions for projects that include flooring or installation of carpeting, especially in a smaller space where the shifting of larger furniture is not as feasible. These costs should be worked into your budget and decided on well in advance (remember to plan and be flexible!) to save you additional stress.

6. Hire a Designer!
Yes, yes, we’re an Interior Design Firm, so of course we’ll tell you to hire a designer. Trust us; we know what we’re talking about. A designer can help you create a realistic timeline and budget based on their experience of similar scopes of work, making sure you don’t get stuck in the middle of a project.
A designer can also save you time, energy, and money. They handle every detail, make sure the work is done right the first time, and can recommend quality products and laborers. Designers will even come to supervise work being done so you don’t have to worry about stopping your life and leaving work for deliveries, letting contractors in, inspecting quality of work, etc.
When you hire a designer, they take care of all the paperwork and contracts. No more headaches trying to negotiate with contractors and figure out complicated construction documents. The bottom line is that a designer is your advocate and will ensure that your project produces your dream space!

Need help with your next home remodel or renovation? Schedule a design consultation today!

Design Trend: Luxury Game Sets
One hot design trend right now is displaying beautiful luxury game sets as both a practical and show-stopping accessory. Game night has never been more stylish! The best part, is you won’t want to store these games in the closet; you’ll want them on full display. Tap into your inner child but keep your sophistication with these gorgeous and whimsical game sets!
One hot design trend right now is displaying beautiful luxury game sets as both a practical and show-stopping accessory. Game night has never been more stylish! The best part, is you won’t want to store these games in the closet; you’ll want them on full display. Tap into your inner child but keep your sophistication with these gorgeous and whimsical game sets!
Monogram Tower from Louis Vuitton
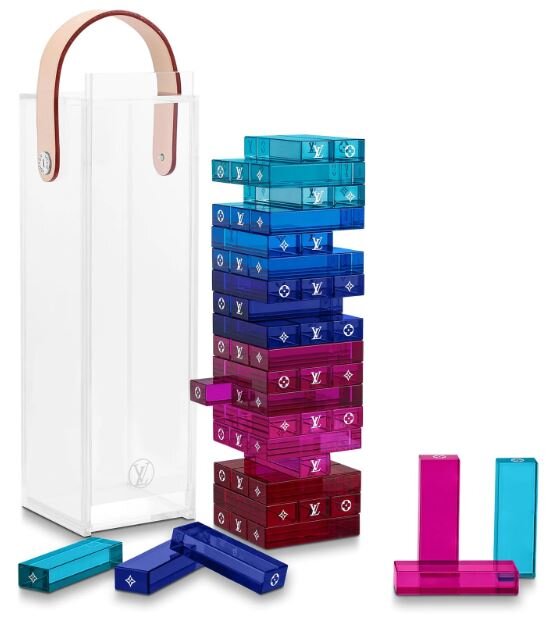
$3,050.00
We love everything about this, from the colors to the bold display. What a fun coffee table centerpiece for a chic living room!

What better way to play this classic, centuries-old game than in this beautiful leather set. We picture this Mahjong set in a dark-wooded study with cozy leather armchairs and hot cups of tea.
Brass Tic-Tac-Toe Set from
Jonathan Adler

$195.00
This tic-tac-toe set with marble base is perfect for all ages of game players. It looks so posh you won’t even care if each play ends in a “cat’s game!”

Price upon enquiry
We absolutely adore the mixture of color, texture, and pattern in this hand-painted backgammon game. This truly is a work of art and would be a dream to display, let alone use for a game night! Purling London has taken luxury gaming to the next level!

$6,500.00
Can you tell we really love Purling London?? This chess set is just so stunning! We love the reflective quality of the board, the gold finish of the chess pieces, and the pop of color integrated throughout. A masterpiece by Darren John that you can play with!
Chess 7-in-1 Heirloom Edition Game from
Pottery Barn

$399.00
Not only is this chess set asking to be displayed, you also get 6 more games included! Made of solid walnut, this sturdy game set will be around for generations. Classically beautiful, yet a little more economical and the perfect gift!
Need help finding fun & creative accessories for your space? Schedule a design consultation today!

Our Latest Tile Crush
While sourcing tile for a client, we recently stumbled upon an amazing tile manufacturer, New Ravenna. We just want to gush about their amazing product! Their beautiful designs and handmade-in-America tiles and mosaics are fully customizable, unique and full of life, and truly a way to bring art into your everyday space. Here’s a little bit more about New Ravenna and our favorite picks from their many collections.
We recently stumbled upon an amazing tile manufacturer, New Ravenna, and just want to gush about their gorgeous product! Their beautiful designs and handmade-in-America tiles and mosaics are fully customizable, unique and full of life, and truly a way to bring art into your everyday space. Here’s a little bit more about New Ravenna and our favorite picks from their many collections.
“Our products are not only trendsetting, they bring art to practical spaces. Design is in our DNA. ” - New Ravenna

Living Wall: A waterjet Mosaic from New Ravenna’s Broad Street Collection


New Ravenna’s handmade stone and glass mosaics are designed and manufactured by their team of over 100 artisans in the scenic Exmore, Virginia and can be found in nearly 200 showrooms worldwide. Our favorite showroom for New Revenna tile, The Fine Line - Chicago.
Some of Our Favorites

Ptolemy’s Cosmos: a hand-nipped stone mosaic, shown in 13 colors of honed stones with brushed Brass accents part of The New World collection by Sasha Bikoff

Janus: A waterjet mosaic shown in polished Calacatta Tia and Saint Laurent from the Illusions Collection
Arbus Medium: a hand-cut mosaic shown in polished Calacatta Radiance, Spring Green, Kay’s Green, Nero Marquina, and Carrara; part of the Palazzo collection
The intricate detailing of these beautiful tiles and mosaics can be subtle, yet stunning, or the complete show-stopping centerpiece of your space. New Ravenna has a number of different collections to fit every aesthetic and design taste. Their designs are so versatile and can be used in residences and commercially.
We were so floored to see these amazing designs below from their KIDDO line by Cean Irminger!

Fleet: a handnipped mosaic in Lapis Lazuli, Iolite, Absolute White, and Moonstone jewel glass, part of the Kiddo Collection by Cean Irminger

Gato de los Muertos: Special Edition mosaic by Cean Irminger

Wild Ones: a waterjet mosaic in Peridot, Olivine, Obsidian, Tortoise Shell, Amber, Citrine, Sardonyx, and Absolute White jewel glass, part of the Kiddo Collection by Cean Irminger
Pillowed Tile
The first tiles that caught our eye from New Ravenna were their pillowed tiles, which have a softer, more weathered look. They’re perfect for someone who wants a more casual style but still wants to utilize natural stone. Check out these unique designs!

Cable Knit Large: a waterjet mosaic in Venetian honed Dolomite, part of the Palazzo collection

Astronomy: a waterjet mosaic in Venetian honed Nero Marquina and Brass, part of the Trove collection
Djinn Grand: Venetian honed Calacatta Tia, hand-cut mosaic from the Studio Line
Need help choosing the perfect tile for your space? Schedule a design consultation today!

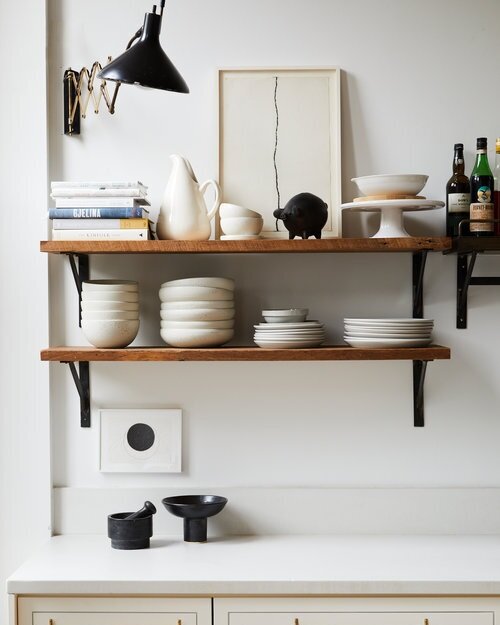
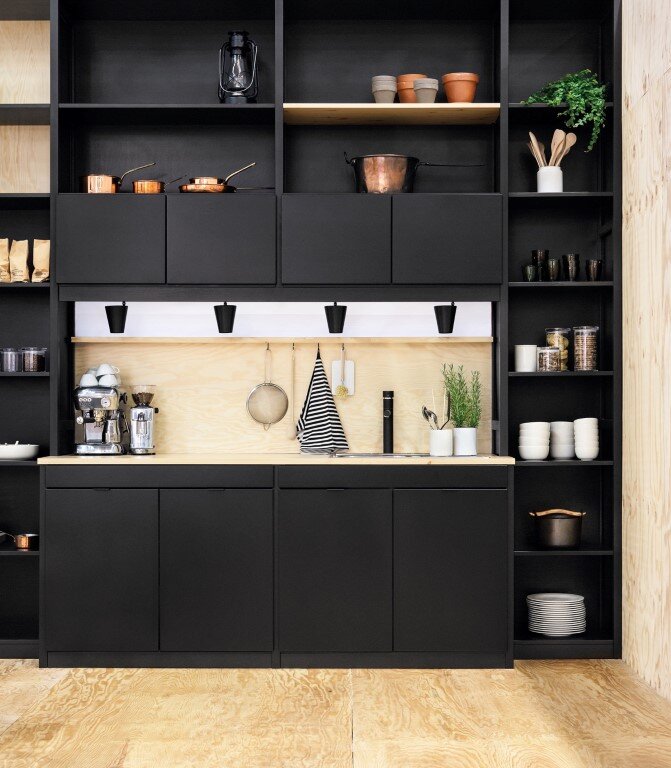
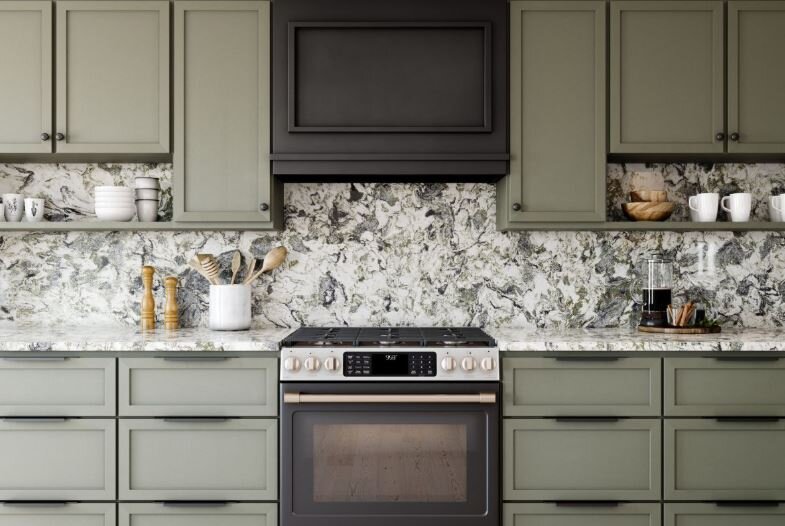
The Pros and Cons of Open Kitchen Shelving
Opting for an open shelf concept in your kitchen can create a stunning visual for your kitchen design. There is so much flexibility in the design choices of open shelving; create an airy, open feel in small kitchen; showcase a minimalist and rustic lifestyle; communicate modern sophistication with clean lines. However, open shelving is not everyone. On the fence about whether this design style is for you? Read on as we look a little more in depth on the pros and cons of utilizing open shelving for your kitchen..
Opting for an open shelf concept in your kitchen can create a stunning visual for your kitchen design. There is so much flexibility in the design choices of open shelving; create an airy, open feel in small kitchen; showcase a minimalist and rustic lifestyle; communicate modern sophistication with clean lines. However, open shelving is not everyone. On the fence about whether this design style is for you? Read on as we look a little more in depth on the pros and cons of utilizing open shelving for your kitchen..
An Honest Discussion on Open Kitchen Shelving
Open shelving in a kitchen seems to be a design trend that you either love or hate. There are quite a few benefits to having all your kitchen items on complete display, but it might not be for everyone.
Accessibility
With opening shelving, you’ll have easy access to all your everyday kitchen necessities, such as glasses, dishes, and cookware. Guests will feel welcome with your home life showcased, and no one will have to ask where the glasses are.It also makes unloading that dishwasher a little simpler without having to worry about opening and shutting cabinet doors. However, it goes without saying that your dishes are now on display and should be aesthetically pleasing to your space. You’ll have to keep everything well organized and to a minimum. No one likes to have their clutter out for the world to see!
You can also take this as an opportunity to Marie Kondo your kitchen and get rid of all those dishes and kitchen items you have stashed in the back of the cupboards (oh hi, gravy boat I’ve never used before!) but haven’t had the motivation to donate.
Aesthetic
Open shelving can help a tiny kitchen feel open and airy just by taking those cabinet doors out of the equation. You’ll also be able to utilize the wall behind as a design aesthetic, whether is be a beautiful backsplash tile, natural wood, or a popping paint color. The shelves themselves can range from sleek, über-modern to rustic, unfinished wood, centering your kitchen design around your storage. Have some beautiful serving dishes, vases, or pitchers to display? Open shelving is a great way to get everyday aesthetic use out of these items, even if you don’t use them on a day-to-day basis. LED lights are easy to install on your shelving to help create a displayed feel while adding a bit more light to your space. You can also consider using some of your open shelving to display a few books, greenery or herb gardens, and decorative pieces that you might ordinarily store on the counter.

Maintenance
While there’s technically not a huge amount of maintenance for an open shelving concept in your kitchen, you will have to be diligent about keeping your shelving and kitchen items clear from dust and debris. You probably won’t need to worry about your everyday dishes and most-used items, but larger serving platters and pitchers may get dusty from sitting unused for the majority of the time. Shelves lower to the ground are especially susceptible to dust (or animal hair!) accumulation, so you’ll want to stay vigilant when it comes to your kitchen cleaning routines. If you’re using an untreated wood, you'll need to oil the shelves regularly to keep them from drying and cracking.
One more thing you’ll want to be sure of before you start packing the shelves with your kitchen items is how much weight each shelf can hold. Be proactive and choose quality material for your shelves to ensure they won’t warp, sag, or damage your walls. Better yet, we highly recommend using a professional to help choose the right shelves, braces, and installation for your shelving. The last thing you want is for your good china to come crashing down!

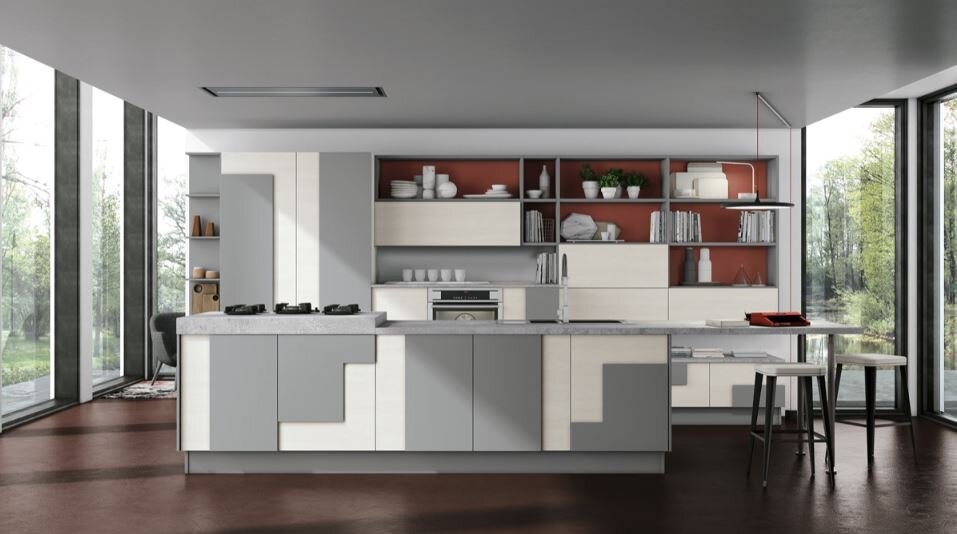
Cost and Compromise
One of the best perks of opening kitchen shelving is that it can cost a fraction of the price for traditional above-the-counter wood cabinets. Less material and labor = less money. However, the minimalism look of going completely open for your shelving is not for everyone. A great compromise for those that love the look but aren’t read to fully commit is opting for built-in open shelves flanked by closed cabinets. Another great idea for those who want their items on display but are wary of the open concept is using glass cabinet doors. This look can still give your kitchen the airy, light feeling of open shelving, but protects your items from dust accumulation.
Need help deciding on new shelving or cabinets for your kitchen? Schedule a design consultation today!

Our Top 5 Favorite Sconces
A beautiful interior needs the right kind of lighting to really shine! Wall sconces are a great way to brighten up a room without adding extra floor lamps or tables for table lamps. They’re practical, but also come in so many styles and designs that it’s easy to choose one to really communicate a personality and tone for the space. Sconces can be simple and functional, highlighting certain art pieces or serve as the perfect bedtime reading light. They can be ornate and fun, tying a design together while communicating sophistication. Here are Sarah Jacquelyn Interior’s top 5 wall sconces for 2020!
A beautiful interior needs the right kind of lighting to really shine! Wall sconces are a great way to brighten up a room without adding extra floor lamps or tables for table lamps. They’re practical, but also come in so many styles and designs that it’s easy to choose one to really communicate a personality and tone for the space. Sconces can be simple and functional, highlighting certain art pieces or serve as the perfect bedtime reading light. They can be ornate and fun, tying a design together while communicating sophistication. Here are Sarah Jacquelyn Interior’s top 5 wall sconces for 2020!
Ersa Wall Light from Lightology

Laurie’s choice: The Ersa Wall Light was designed by William Brand and named for the Greek Goddess of dew. It’s also available in several finishes and shades. Laurie says, “This ethereal sconce reminds me of a dew drop on a new spring branch. I love the organic shape of the clear shade. The finish is perfect for a chic living room or entryway.”

Bianka’s choice: The Lloyd Jeweled Sconce was designed by Kate Spade New York. Bianka says, “To me, I think of sconces as the "jewelry" of the room. These literally look like earrings, and that's why I love them!” We think this sconce would be a fabulous addition to a stylish bedroom.
Ori Sconce from Circa Lighting

Sarah’s Choice: Designed by Kelly Wearstler, the Ori Sconce definitely makes some excellent points! Sarah says, “The proportions of this sconce are great at 20” x 7”. I love the angles and the movement they create. I’m definitely feeling the antique-burnished brass finish and think it’s just beautiful. I’d love to use this dynamic sconce in an entryway with a fun textured wall covering, maybe a dark and moody vibe with a decorative mirror.”
Yale Large Sconce from Arteriors

Bianka’s choice: The Yale Sconce, designed by Arteriors, displays rows of delicate antique brass chains draped over the frame with staggered lengths, giving it a tassel effect. Bianka says, “I love that these sconces are super long and dramatic! I love their push and pull of elegance and edginess.”
Monkey Hanging Wall Lamp from Lightology

Sarah’s Choice: This Monkey Hanging wall lamp, designed by Seletti, is a fun and unique way to add a little extra lighting to your space. It is available in white or black resin and is available with an optional lampshade. Sarah says, “I love the whimsy of this fixture. It's unexpected and a definite conversation piece. I would put it in a small space, like a laundry room, powder room, or walk-in closet. Play up the theme with a jungle wallpaper print!”
Need help finding the perfect wall sconces for your space? Schedule a design consultation today!
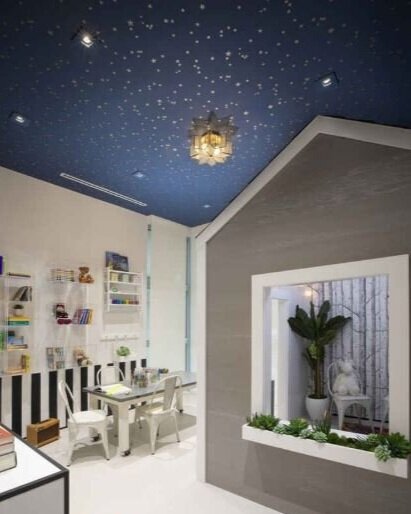
Wallpaper on the Ceiling?! Yes, Please!
A room traditionally has four walls; think outside (or on top of) the box and see your ceiling as the fifth wall! Wallpapering ceilings is a design trend that is quickly becoming more mainstream. It’s a great way to introduce more color, texture, and a “pop” of character to any room.
A room traditionally has four walls; think outside (or on top of) the box and see your ceiling as the fifth wall! Wallpapering ceilings is a design trend that is quickly becoming more mainstream. It’s a great way to introduce more color, texture, and a “pop” of character to any room. Wallpapers have come so far in the last 20 years, utilizing eco-friendly materials and beautiful patterns and images in a variety of mediums. By choosing the perfect wallpaper, you can create illusions of more light, more height, and a bigger room size. Here’s how we like to use wallpaper on ceilings at SJI!

When to Use it
A wallpapered ceiling can do wonders for a room with already busy walls, such as a dining room with large, open doorways and a lot of windows. It’s a great way to introduce more pattern and texture without a chaotic feel. The clean palette of a ceiling gives the wallpaper a chance to really make a statement of it’s own. After all, white ceilings are boring!
Whether you’re adding more color to a room with neutral walls or complimenting another pattern, it’s essential to pair your wallpaper with the right paint or wall covering to really execute the design.
When mixing with another wall covering, try to vary the scale and pattern so as not to overwhelm the room. A busier pattern on the wall would warrant a simpler, geometric pattern on the ceiling.

These gorgeous wall papers from Thibaut are a great example of appropriately mixing patterns, using “Brad” on the ceiling to compliment walls covered in “Peacock Garden”.


What Patterns to Use
Geometric patterns with some contrast are great for ceilings. Because they’re are non-directional, undefined patterns will look good from all angles and won’t look like they’re upside down. Since a ceiling is not directly in your line of vision, you’ll want something with contrasting color patterns so it doesn’t get muddled in your peripheral. Smaller scaled patterns don’t translate well at a distance, so it’s best to keep them to a larger scale.
We love to utilize a metallic paper to add texture while still reflecting light into a room. It's a great way to introduce more light into a dark or moody room.
Dramatic floral wallpapers can introduce a bit more emotion into a room that would otherwise feel plain. Because of the intensity of floral prints, we suggest using them with a more neutral palette for the rest of the room. You’ll also want to ensure you choose a floral pattern that doesn’t seem to have a “right side up” feel.
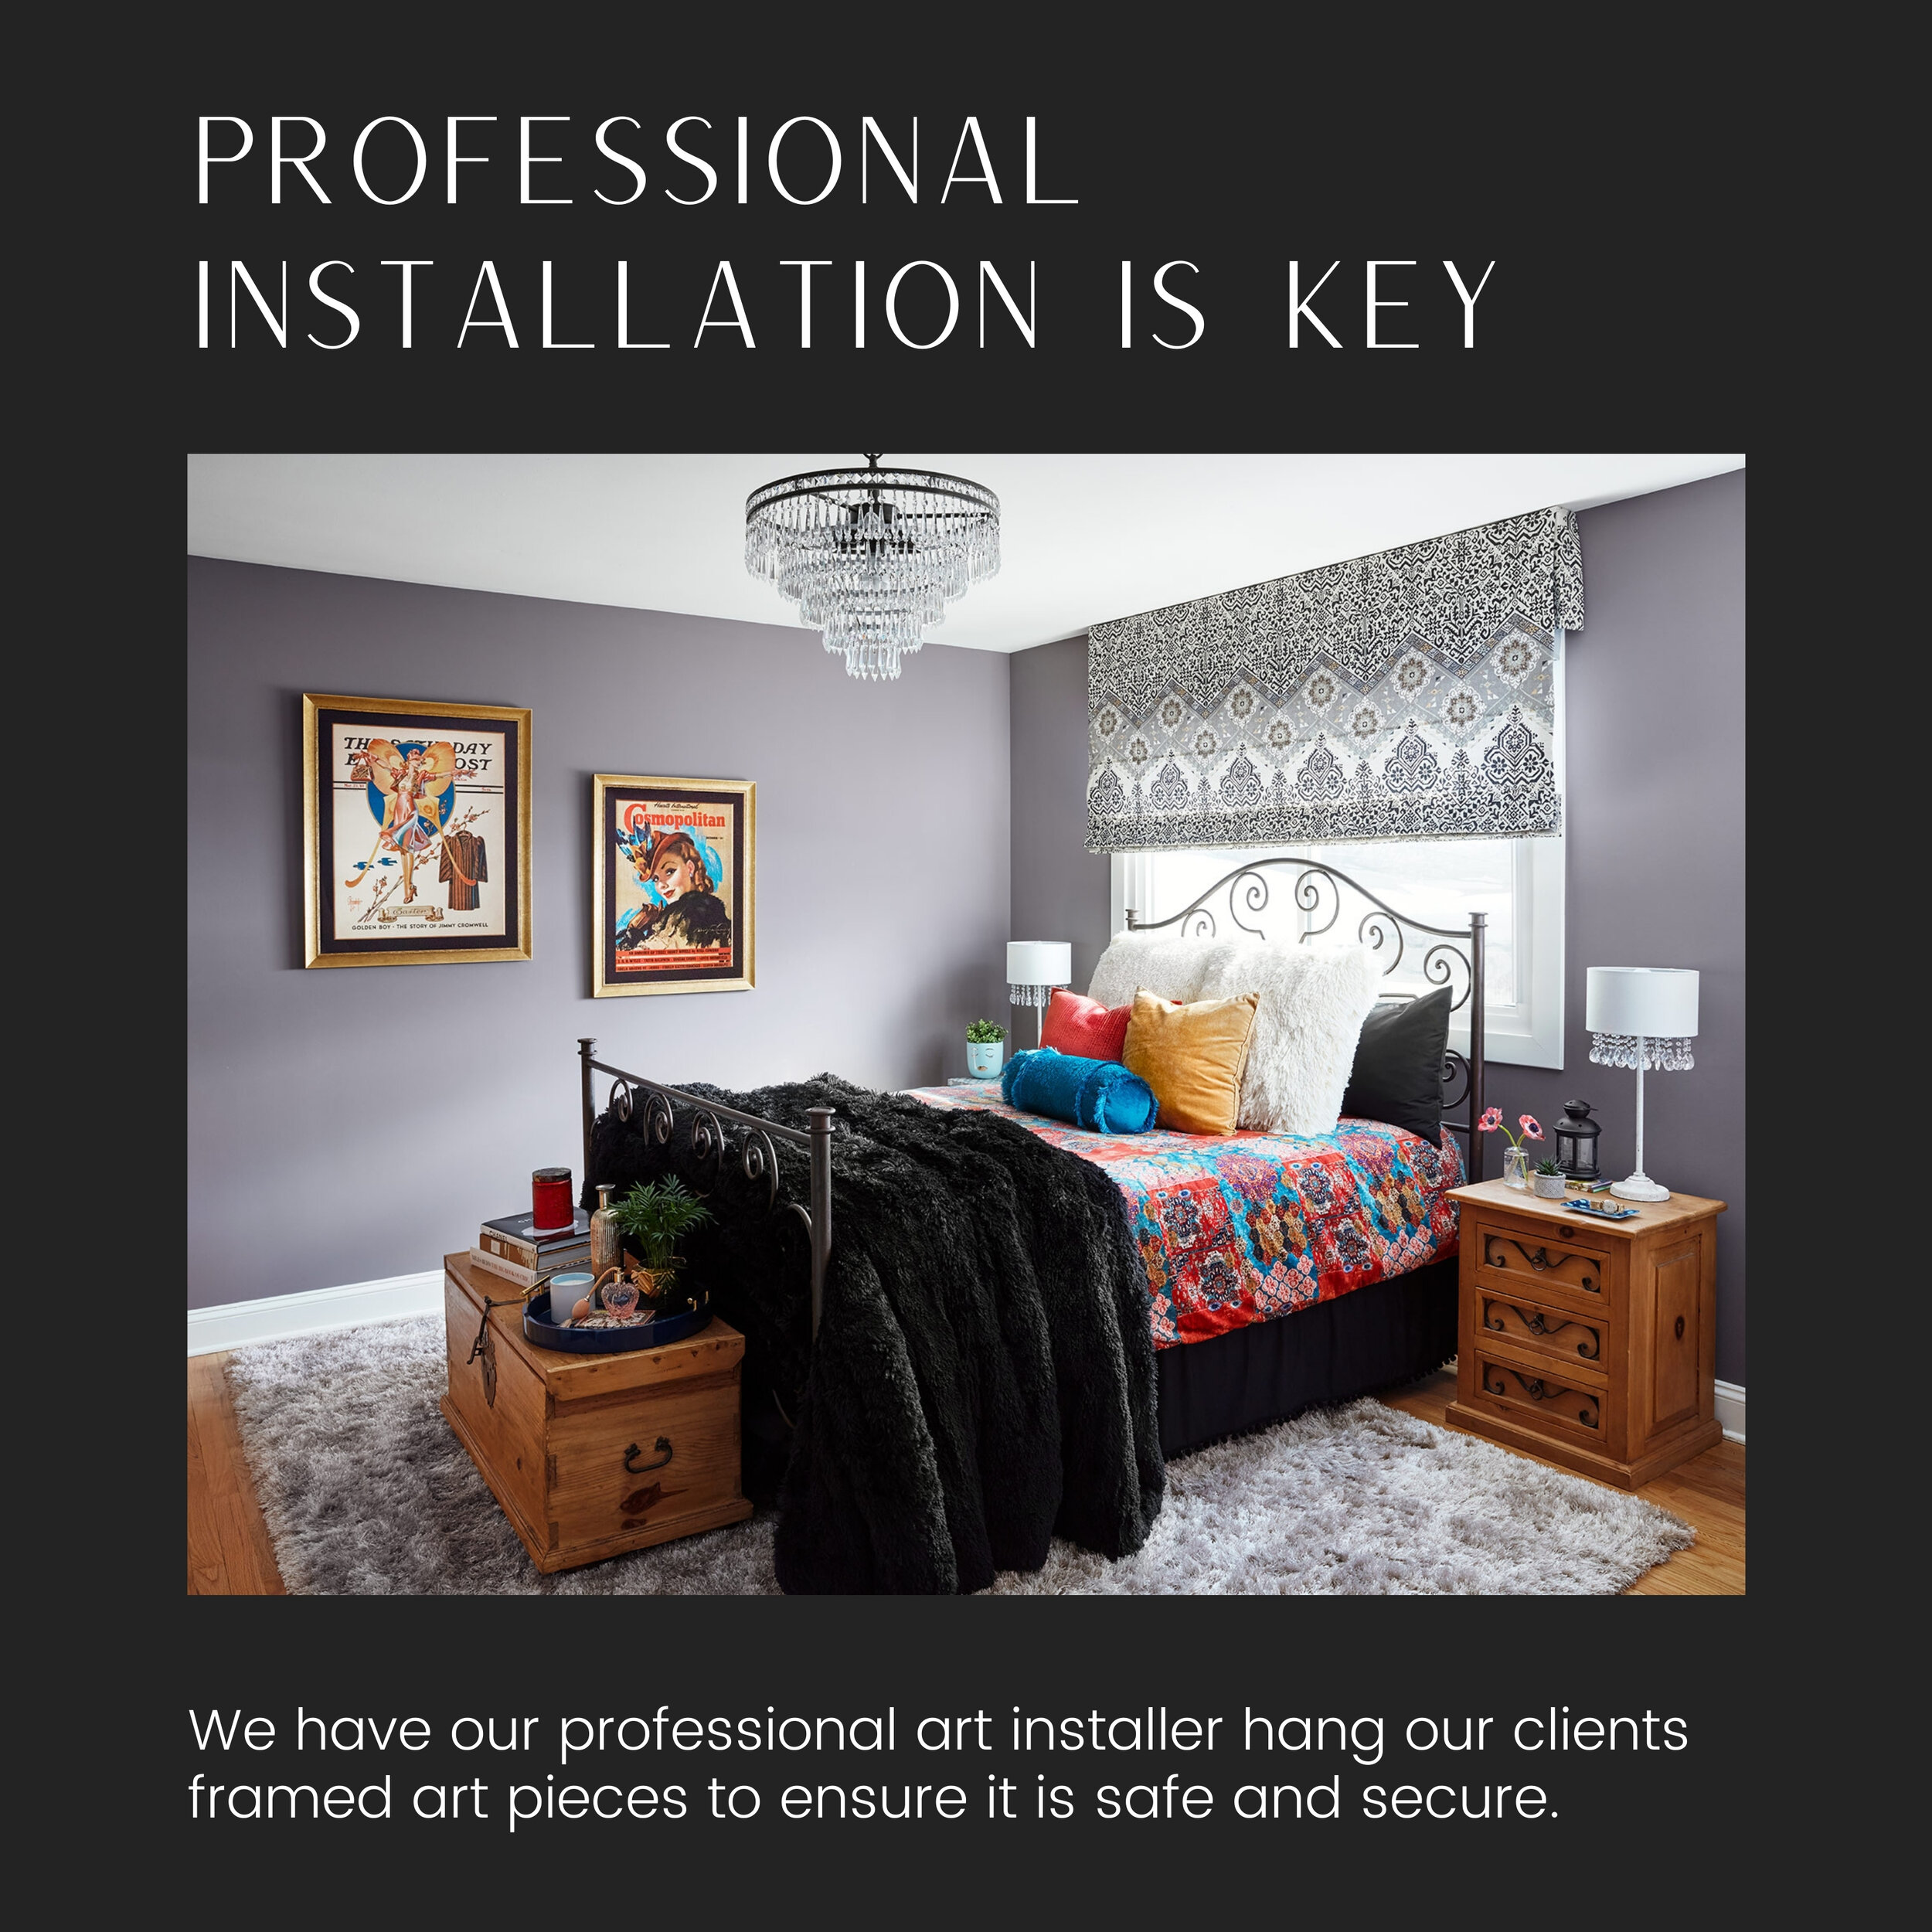
Consider Professional Installation
We strongly recommend hiring a professional contractor to install any wallpaper, but especially when it’s installed on the ceiling. There is no room for error, so you want someone with experience and the right supplies to get the job done efficiently and correctly. Mistakes made while wallpapering can’t be covered up on a ceiling and will be there as long as the wallpaper is up.
It’s also important to consider just how much your time is worth. A professional who is experienced with wallpaper can quickly and efficiently get the job done, while you may be spending twice or more of the time trying to get it perfect. The right tools required for installation of wallpaper alone could cost you quite a bit of money and a professional installer will have their own. Plus, once they’re done, you’re not the one expected to clean up the leftover mess.
Working with an interior designer for your wallpaper needs ensures that you get the right measurements for your space so you’re buying just the right amount of wallpaper. A designer can also assist you in finding expert installation of your wallpaper so it’s done well the first time.
Need help finding the perfect wallpaper for your space? Schedule a design consultation today!

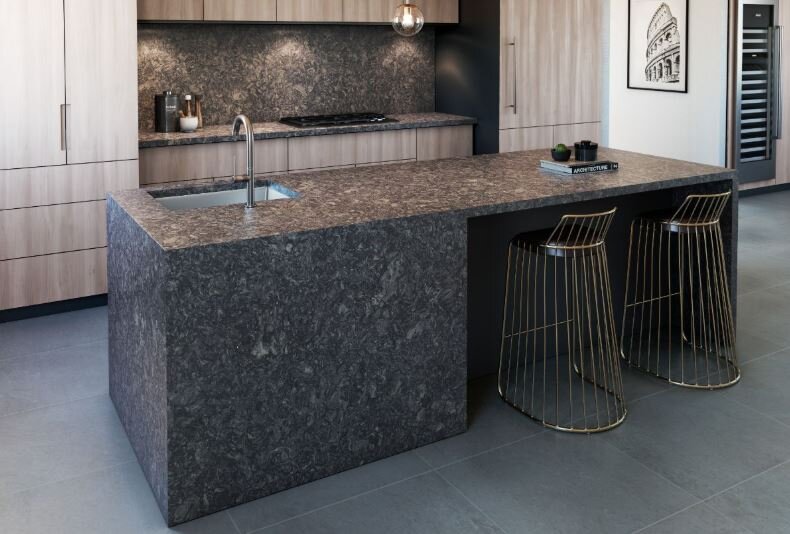
How to Maintain Your Quartz Countertops
Quartz is a popular choice for countertops given that it is harder than granite, comes in a variety of colors, textures, and thicknesses, and is easy to care for. However, there are a few do’s and don’ts when it comes to your quartz. If cared for correctly, your quartz will last for years to come! Here’s how we recommend you care for your quartz surfaces.
Quartz is a popular choice for countertops given that it is harder than granite, comes in a variety of colors, textures, and thicknesses, and is easy to care for. This man-made countertop is non-porous and non-absorbent so no need to worry about it harboring harmful bacteria. However, there are a few do’s and don’ts when it comes to your quartz. If cared for correctly, your quartz will last for years to come! Here’s how we recommend you care for your quartz surfaces.


How to Clean Quartz
Quartz is often known for being maintenance-free stone. While you won’t have to seal or polish your quartz countertops, you’ll still have to clean them and avoid certain chemicals to keep them in beautiful condition.
The best and simplest way to clean your quartz is by using a soft cloth with water and dish soap. This should remove any dust, food residue, or spills. It is important to note that spills should be cleaned up soon after they occur, as stains from juices or coffee could set in if left to sit.
In the event of tough stains or sticky residue on your quartz, Goo Gone is a safe option. Simply cover the spot, let it soak for 5-10 minutes, and wipe away.
It’s always best to check with your quartz manufacturer before using any cleaning product on your surface. See Cambria’s approved list of cleaners here.

Things to Avoid
Never use a bleach-based product on your quartz, as this can damage your countertops. You’ll also want to stay away from any abrasive sponges or cloths and cleaners such as Comet® or Soft Scrub®.
Stone surfaces such as quartz can be easily damaged by sudden, excessive heat. Be sure to avoid placing hot pots, pans, and casserole dishes directly on your quartz countertops and tables. Always use a hot pad or trivet!
While quartz is considerably durable and scratch-resistant, this does not mean it is completely scratch-proof. It is always recommended to use a cutting board when chopping or cutting on your countertops.
Need help finding the perfect countertops for your space? Schedule a design consultation today!

Get NCIDQ Certified in 2023!
If you’re interested in learning more about the NCIDQ Exam, why it’s important, and how it can benefit you as a designer, you’re in the right place! I’m Sarah Schwuchow, a Registered Interior Designer in Illinois and I passed the NCIDQ exam in the Spring of 2018. I am also a CIDQ Ambassador, which means I help mentor exam candidates, educate students, and promote the value of NCIDQ certification to the public. I’m on a mission to help other designers pass the NCIDQ exam and become Registered Interior Designers!


Hello! I’m so glad you are interested in learning more about the NCIDQ Exam! I’m Sarah Schwuchow, a Registered Interior Designer in Illinois and I passed the NCIDQ exam in the Spring of 2018.
I am also a CIDQ Ambassador, which means I help mentor exam candidates, educate students, and promote the value of NCIDQ certification to the public. I’m on a mission to help other designers pass the NCIDQ exam and become Registered Interior Designers!
If you’re interested in learning more about the NCIDQ Exam, why it’s important, and how it can benefit you as a designer, you’re in the right place!
It’s been 3 years since I earned my NCIDQ certification. This certification has benefited me in numerous ways, from opening my own business to having the confidence and knowledge to effectively communicate on a job site. This exam is not just for commercial interior designers; I use my NCIDQ knowledge every day as a residential interior designer and highly recommend all interior designers work towards this certification.
I always felt there was a need for more NCIDQ mentorship among the design community. After passing the exam, I looked into the CIDQ Ambassadors program where I could provide mentorship to candidates and educate Interior Design students on the value of the NCIDQ exam. I strive to be a resource to other designers, sharing my NCIDQ journey and encouraging them to take the exam.
I have helped many aspiring designers work towards this certification as well. In 2019 I created a study group through ASID to help designers pass the NCIDQ exam. Since then, the group has grown and we now partner with IIDA IL to broaden our reach.
Just starting to think about taking this exam can be a daunting task in itself! I’m here to help break down the requirements and get you on track for taking the exam. Keep reading below for step-by-step instructions on how you can become NCIDQ Certified.
Please note - the statements on this website are my own and not a reflection of CIDQ as an organization. This blog post is intended to be a supplementary guide for your NCIDQ journey. Please visit CIDQ.org for more information regarding qualifications, expectations, current prices, etc. Familiarize yourself with the CIDQ website, eligibility requirements, application process, registration process, and important dates and deadlines!
Application deadline
Applications for the Spring 2023 Exam needed to be
submitted by January 31st and July 31st for the Fall 2023 Exam.
Do NOT submit your application until you are ready to begin sitting for the NCIDQ Examination. Your testing windows are based on application approval.

What is NCIDQ Certification and Who is CIDQ?
CIDQ History
CIDQ was created by the American Institute of Interior Designers (AID) and the National Society of Interior Designers (NSID) in the late 1960s. The group officially incorporated as a not-for-profit in 1974 and was the basis for issuing credentials to Interior Design professionals. The AID and NSID would eventually merge to become what is now the American Society of Interior Designers. CIDQ went on to run as an independent organization, which administers the NCIDQ exam
What Does NCIDQ Mean?
The NCIDQ exam stands for the National Council for Interior Design Qualification. This is a globally recognized exam and the highest standard an Interior Designer can earn. The NCIDQ Exam was created by the Council for Interior Design Qualification (CIDQ). Once you pass all three sections (IDFX, IDPX, Practicum) of the the NCIDQ Exam, you become an NCIDQ Certificate Holder. You can then use the NCIDQ appellation after your name: Sarah Schwuchow, NCIDQ. The exam is offered for the entire months of April and October at Prometric Testing Centers. All three sections of the exam are now computerized.
Why Does NCIDQ Certification Matter?

NCIDQ Certification matters because it is an indicator of our proficiency and knowledge.
The Interior Design profession is still relatively young at only about 100 years old.
We are still working towards reasonable regulation, the title acts, practice acts, stamping abilities, and legislative rights for our profession.
NCIDQ Certification helps to create a standard to ensure designers have the knowledge, education, and experience to create spaces that meet codes, regulations, ADA requirements, health, safety, and welfare.
I am proud to be an NCIDQ Certified Interior Designer that can contribute to the development of the Interior Design profession as a whole.
From a legislative standpoint in Illinois, it is critical that we ensure the “Registered Interior Designers Act'' stays in effect, as many legal benefits come with this title such as lien rights.
In 2022, a major advancement in our profession was made. Governor Pritzker signed historic legislation that establishes practice rights for interior designers in Illinois. Read more Here.

10 Reasons Why You Should Take the NCIDQ Exam
NCIDQ Certification sets you apart from unqualified designers and decorators.
It is an indicator of your proficiency and knowledge.
NCIDQ Certification shows your commitment to the Interior Design profession.
You’ll earn respect among your colleagues, employers, and clients.
You’ll have the potential to earn more money and promotions, as many firms require NCIDQ Certification.
Increasing the number of registered/licensed designers elevates our profession.
NCIDQ Certification helps with legislation and Interior Design rights.
In Illinois, you must be an NCIDQ Certificate Holder to become a Registered Interior Designer, which gives you lien rights and practice rights now!
Registered Interior Designers in Illinois now have the right to file liens. Unregistered designers and decorators do not hold this right.
“To date, more than 30,000 people around the world have earned NCIDQ Certification, the gold standard for interior design professionals” (CIDQ.org).
What’s on the NCIDQ Exam?
“The strenuous requirements of the NCIDQ Examination give clients and employers added confidence in the caliber of work from NCIDQ Certified designers” (CIDQ.org).
The NCIDQ examination is no walk in the park. The level of difficulty proves that an NCIDQ designer possesses the knowledge and expertise for building systems, codes, construction standards, contract administration, design application, professional practice, and project coordination.
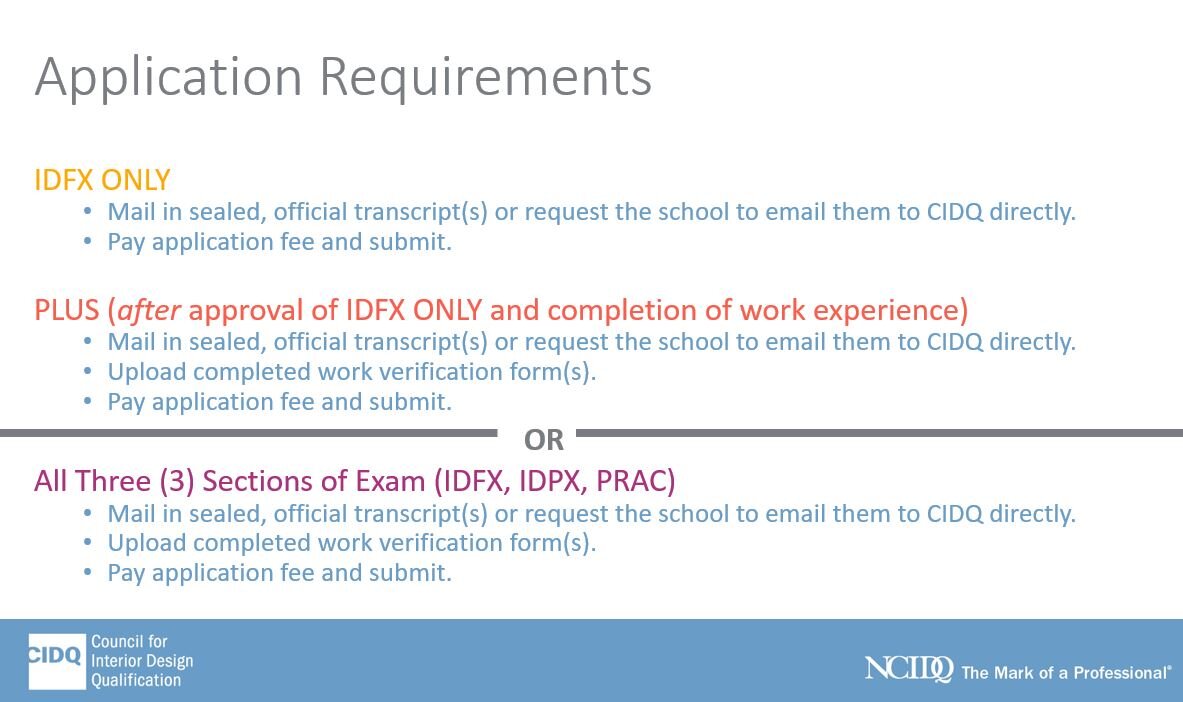
The exam is broken down into 3 parts: Interior Design Fundamentals (IDFX), Interior Design Professionals Exam (IDPX), and Practicum. Each section measures a candidate’s knowledge and proficiency on different topics related to health, safety, and welfare. All exams are taken during the entire month of April and October. Applicants have five years to complete all three exams.
Fundamentals Exam (IDFX)
Eligibility: Candidates can take this part of the exam before completing their work experience hours. This exam can be taken as early as a student’s final year of school for a Bachelors's or Masters's program.
Exam Format: 125 multiple-choice questions (100 Scored and 25 Pilot Questions)
Exam Length: 3 Hours
Application Fee for IDFX Only: $95.00
Registration Fee: $295.00
Testing Location: Remote Protectoring or Prometric Facility
Passing Score: 500 (Scores are weighted and on a scale of (200-800)

Professional Exam (IDPX)
Eligibility: Candidates must complete their education and work hours before applying for this exam. *WORK EXPERIENCE IS CHANGING IN 2024
Exam Format: 175 multiple-choice questions (150 Scored and 25 Pilot Questions)
Exam Length: 4 Hours
Application Fee for IDPX and Prac Only: $145.00
Application Fee for all 3 Sections: $225.00
IDPX Registration Fee: $355.00
Testing Location: Remote Protectoring or Prometric Facility
Passing Score: 500 (Scores are weighted and on a scale of 200-800)

Practicum (PRAC)
Eligibility: Candidates must complete their education and work hours before applying for this exam. *WORK EXPERIENCE IS CHANGING IN 2024
Exam Format: 114 Questions (105 scored, 9 Pilot Questions), Interactive computerized exam consisting of 3 case studies: large commercial, small commercial, and multi-family residential. No AutoCAD, or Hand Drawing.
Exam Length: 4 Hours
Application Fee for IDPX and Prac Only: $145.00
Application Fee for all 3 Sections: $225.00
Practicum Registration Fee: $460.00
Testing Location: Prometric Facility
Passing Score: 500 (Scores are weighted and on a scale of 200-800)

How Long do I have to Take the Exams?
ALL THREE SECTIONS: Must be passed within 10 exam administrations ( About 5 Years)
IDFX ONLY: Must be passed within 4 exam administrations + IDPX & PRACTICUM (2nd stage for IDFX ONLY applicants): Must be passed within 10 exam administrations.
Exam testing windows are April and October
Ready to Take the Exam?
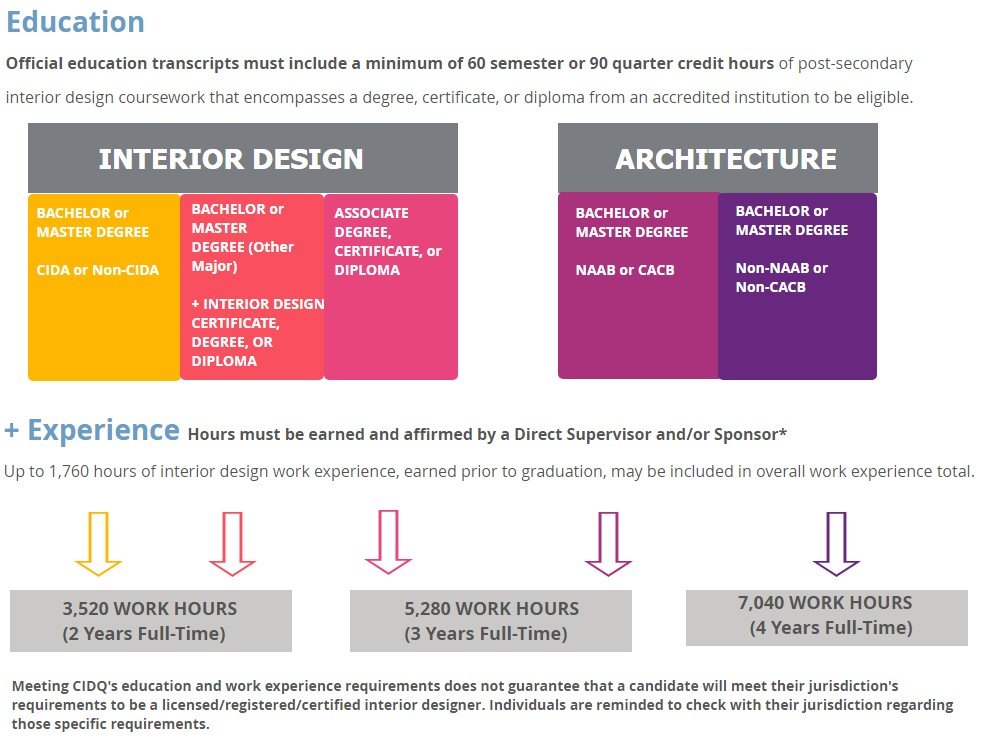
Step 1: Eligibility Requirements
First things first—are you qualified to take the NCIDQ Exam? Visit the CIDQ website for full eligibility path requirements based your education and work experience. Work Experience will be changing for 2024!

Step 2: Create an Account
Before you can apply, you must create an account with CIDQ. Click here to register and then log in with instructions received in your email. If you have trouble, email inquiries@cidq.org for help.

Step 3: Applying for the Exam
There are two route options for applying for the NCIDQ Exam:
Option 1: Apply only for the IDFX. If you apply just for the IDFX now, you will need to submit another application for the IDPX and Practicum once you finish your work experience hours.
Application Fee for IDFX only: $95.00 (Second application for IDPX and Prac will be $145.00)
Option 2: Apply for all three sections.
Application Fee for all 3 Sections: $225.00
Applications are a one-time fee. Your application will also require you to submit an official transcript from your institution and your work experience (for IDPX & Practicum). Make sure you leave enough time for your sealed official transcripts to arrive, as any incomplete applications will not be considered after the deadline and you’ll have to wait until the next testing season.
Step 4: Registering and Scheduling Your Exam
Once your application has been approved, you will receive an email notifying you that you that can register for the exam and schedule a date at a Prometric Testing Center. Make sure to register early so you can lock in your preferred exam date!
From this point, you have 10 testing windows to pass all three sections of the NCIDQ exam. If you are only taking the IDFX, you must pass that exam within 4 exam windows. The second stage (IDPX and Practicum) must then be completed within 10 testing windows. Any scores older than 5 years are automatically voided. Registration fees occur each time you take an exam.
Exam Fees
IDFX: $295.00
IDPX: $355.00
PRAC: $460.00
Step 5: Studying
Make sure you leave yourself adequate time to study for this exam. I recommend at least 10 weeks and join a study group. Qpractice are ID Conquer are a great online resource to help you stay on schedule. Stay tuned for my upcoming blog post on my tips and tricks for studying for the NCIDQ Exam!


Join the more than 30,000 people around the world that have earned their NCIDQ Certification!
“Sarah has so much valuable knowledge and creativity to share as a designer. She will take the time to sit down and explain everything no matter what phase of the design process you are in. Sarah played a huge role in my success while studying for the NCIDQ. She was enthusiastic, motivating and genuinely cared. Working alongside Sarah and her team will make the entire process a positive and memorable experience!”

Benjamin Moore's Color of the Year 2020
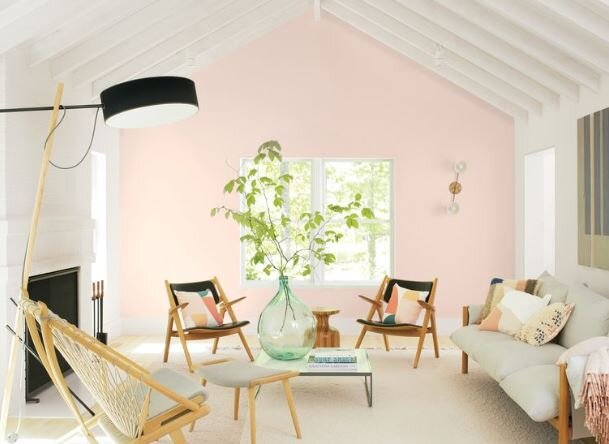
Benjamin Moore just revealed it’s Color of the Year for 2020: First Light 2102-70. Not only does First Light bring an air of calm and relaxation, the complimenting color combinations are endless, making it such a versatile color choice. Benjamin Moore describes First Light as a “soft, rosy hue blooming with potential.” We have to agree! Here’s what we think of the new Color of the Year!
Benjamin Moore just revealed it’s Color of the Year for 2020: First Light 2102-70. Having studied The Psychology of Color, we know how important color is to our everyday lives when it comes to our living spaces. Not only does First Light bring an air of calm and relaxation, the complimenting color combinations are endless, making it such a versatile color choice. Benjamin Moore describes First Light as a “soft, rosy hue blooming with potential.” We have to agree! Here’s what we think of the new Color of the Year!

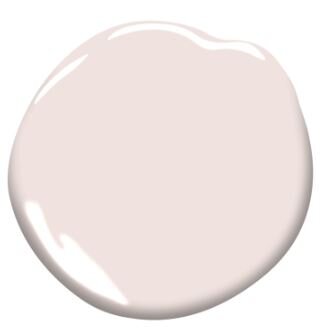
Why We Love It!
First Light is gender neutral enough to use in any room with the right compliments. The bright and airy color makes a room feel more open, especially when combined with lots of natural light. It’s uplifting, cheery, and serene; whether used for the entire space or a nice accent wall, First Light is definitely a great choice!
It pairs well with so many colors, but our favorite pairings are Blue Danube 2020-03 and Crystalline AF485.

Blue Danube

Crystalline